
DEEP GUIDE · ADVANCED
Image Workspace (@vpaint)
An 18-chapter advanced guide to opening @vpaint, generating and editing with AI, composing multiple references, inpainting, outpainting, working with layers, and saving the finished image.
01. Image Workspace overview
Image Workspace is a browser-based AI image studio. Create a new image with natural language, transform a photo or sketch, remove or replace a selected region, and finish the result with layers, shapes, text, adjustments, and filters.
| Task | Best feature | Result |
|---|---|---|
| Create an image from scratch | Generate | New image layer |
| Transform a photo or sketch | Edit | Selected image replaced or a new layer |
| Combine multiple images | Reference-layer compose | New composed layer |
| Remove, replace, or isolate part of an image | Inpaint | Target layer replaced in place |
| Extend the scene beyond an image | Outpaint | Expanded target layer |
02. Start with @vpaint and a launch link
| Chat request | What opens |
|---|---|
| @vpaint | A blank editor |
| @vpaint + image description | An editor with the prompt entered and generation started |
| @vpaint + HTTPS image URL + edit instruction | An editor that loads the image and starts an AI edit |
| @vpaint + turn the content above into an infographic | An editor generating in Infographic mode |
A workspace link is valid for one hour and binds to the first browser that opens it. The same link can be rejected in another browser or device, so keep the original window open while working.
03. Editor layout
| Area | Purpose |
|---|---|
| Top menu | Files, history, view, image adjustments, layers, effects, tools, and help |
| Left toolbar | Selection, brush, eraser, fill, shapes, text, crop, eyedropper, and other direct tools |
| Center canvas | Stage for positioning layers and manipulating selections, masks, and expansion areas |
| Right panels | Preview, color, image information, layer details, layer list, and AI controls |
Use Preview to zoom or fit the document. Layer Details provides exact X and Y positions, width, height, rotation, and opacity. With Auto select enabled, clicking an object on the canvas quickly activates its layer.
04. Create a document and import images
- Choose File → New and set the canvas size and background to start from an empty document.
- Bring in an external image from a file, directory, URL, data URL, webcam, or image search.
- Drop a file onto the canvas or press Ctrl/Cmd+V to add it as a new layer.
- AI-panel Upload image does not place the file first; it reserves that file as the input to the next Edit request.
Canvas Size defines the outer boundary of the final document; layer size defines how an individual image is placed. Change Canvas Size to add working space, and Resize to change the image's pixel dimensions.
05. AI generation and infographics
- Describe the subject, setting, composition, style, lighting, aspect ratio, and intended use in the AI prompt.
- For an information card, enable Infographic and specify the title, sections, figures, and display language.
- Select Generate and watch the progress label and elapsed time. The result arrives as a new layer.
Prompts may be written in Korean, Japanese, English, or another supported language. Titles, labels, and captions inside the image keep the request language unless you say otherwise, but always zoom in and proofread generated lettering.
06. AI editing and target priority
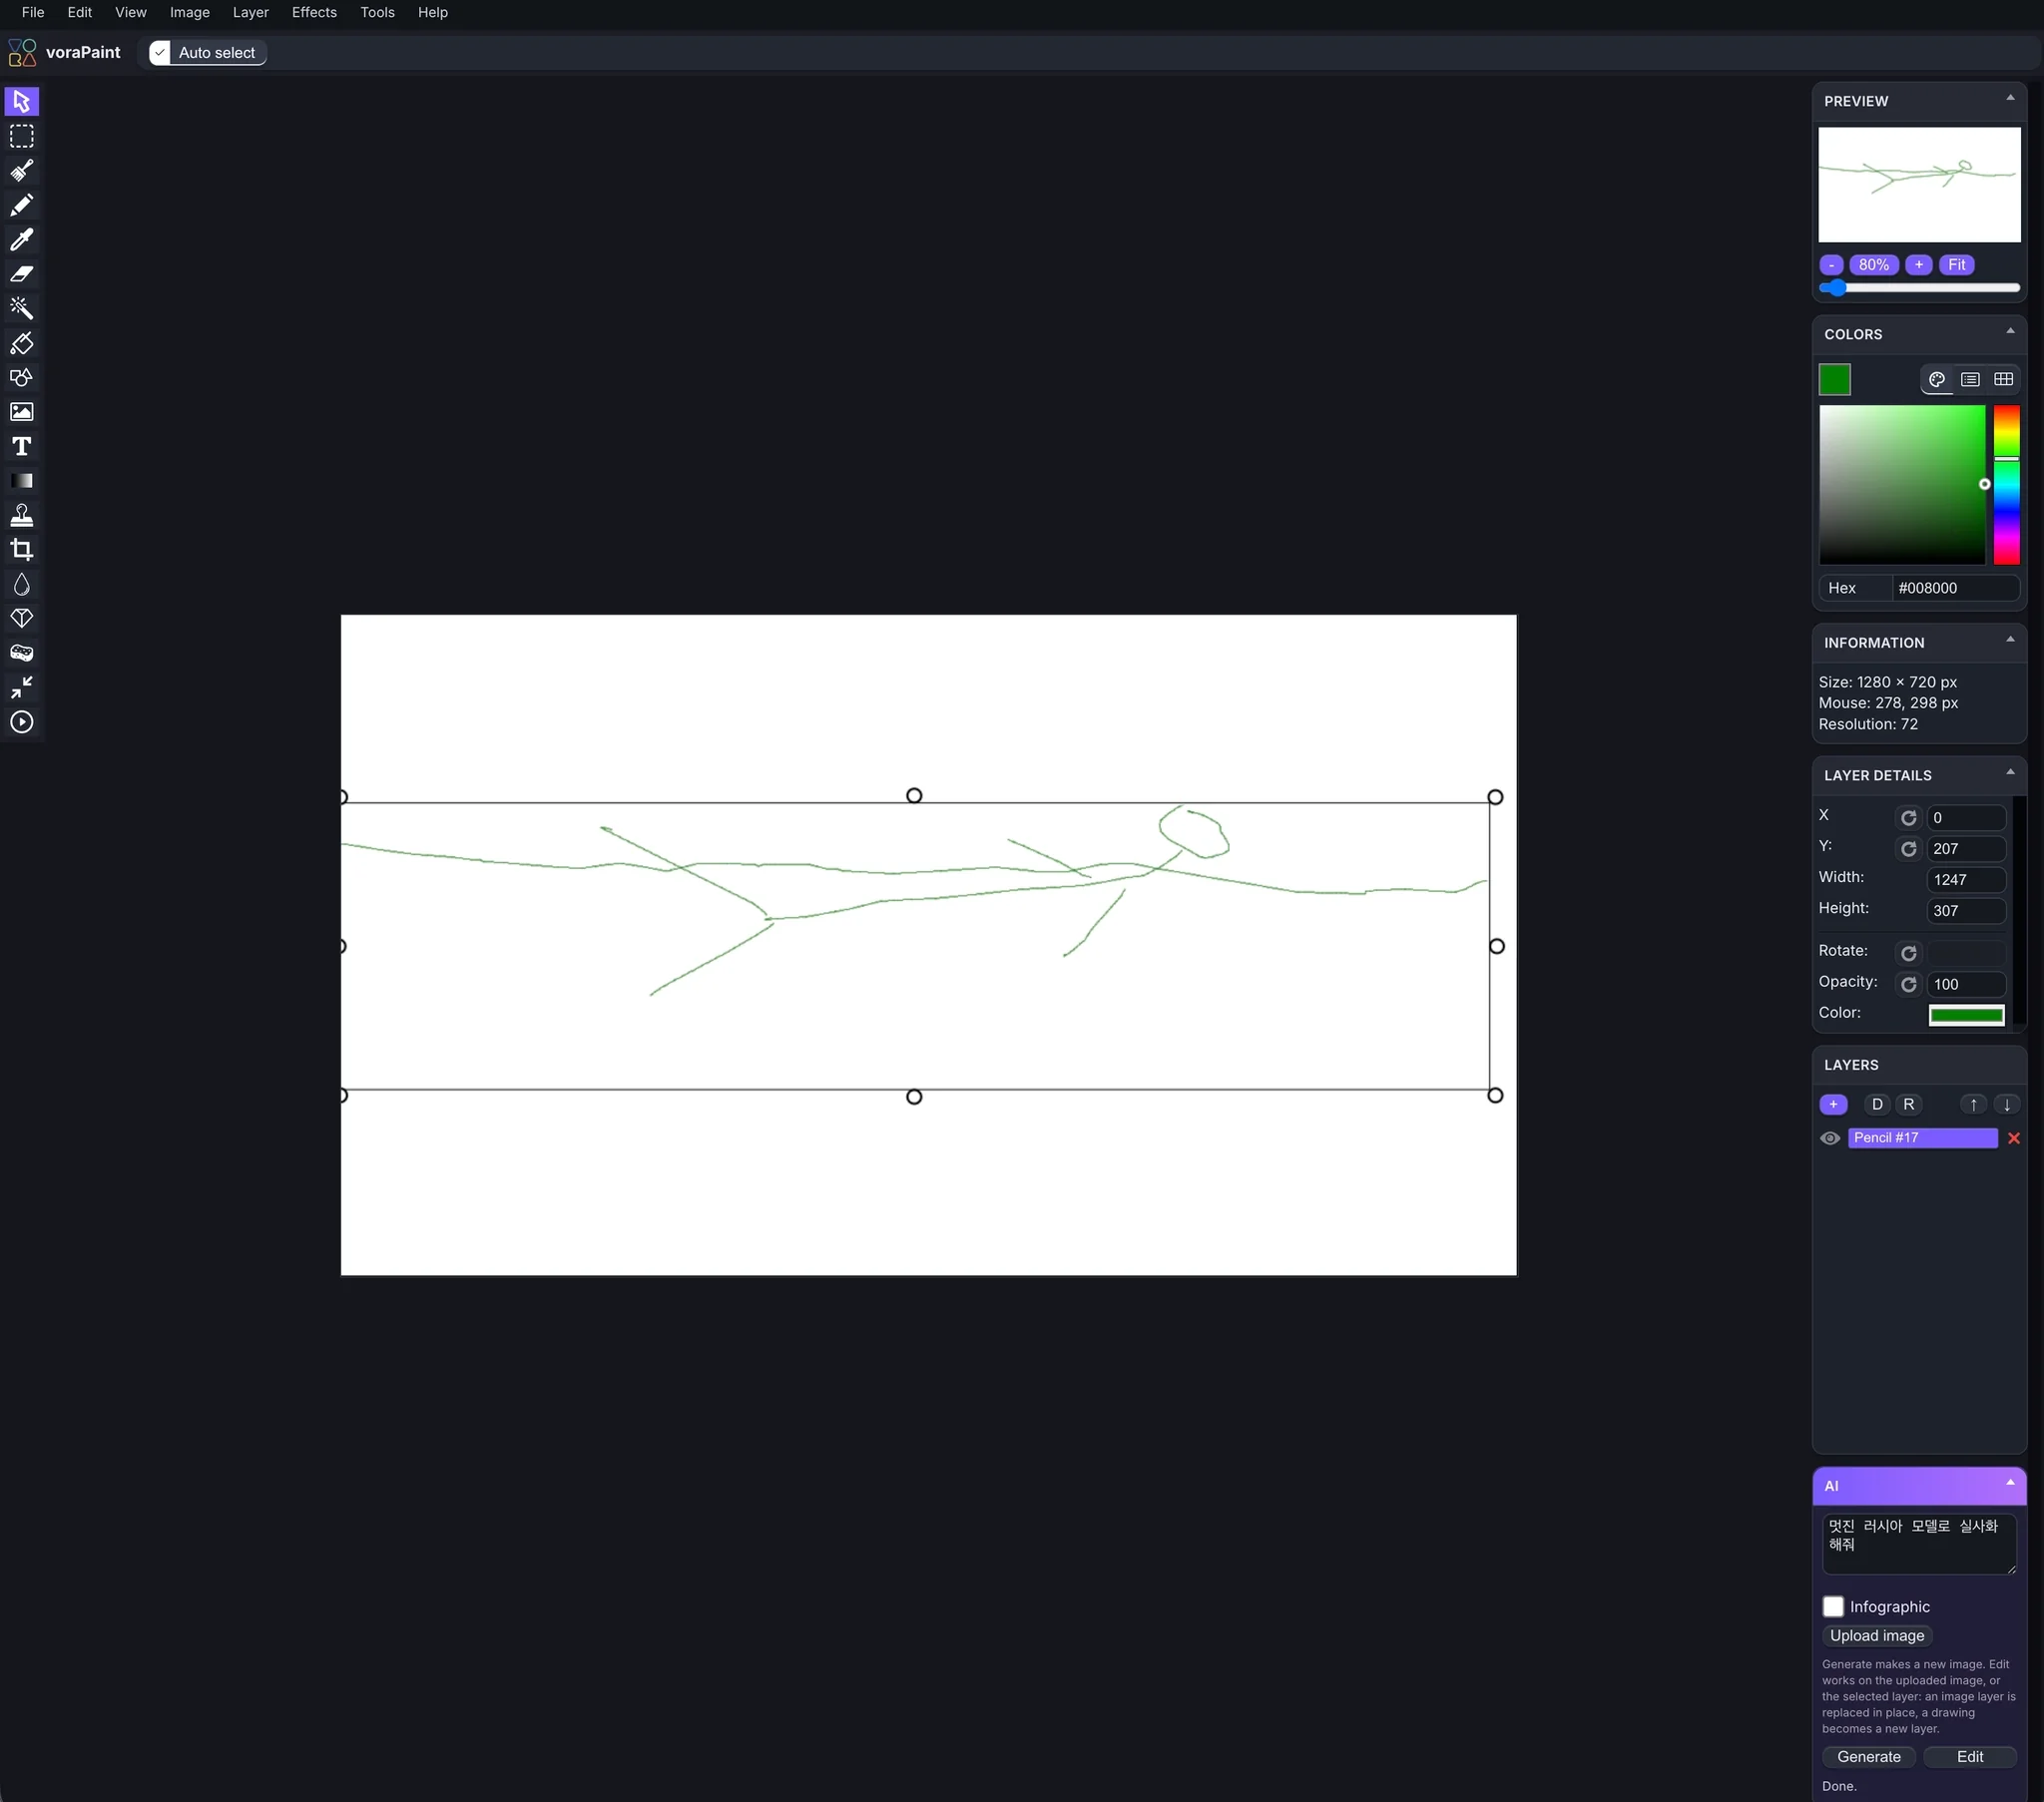
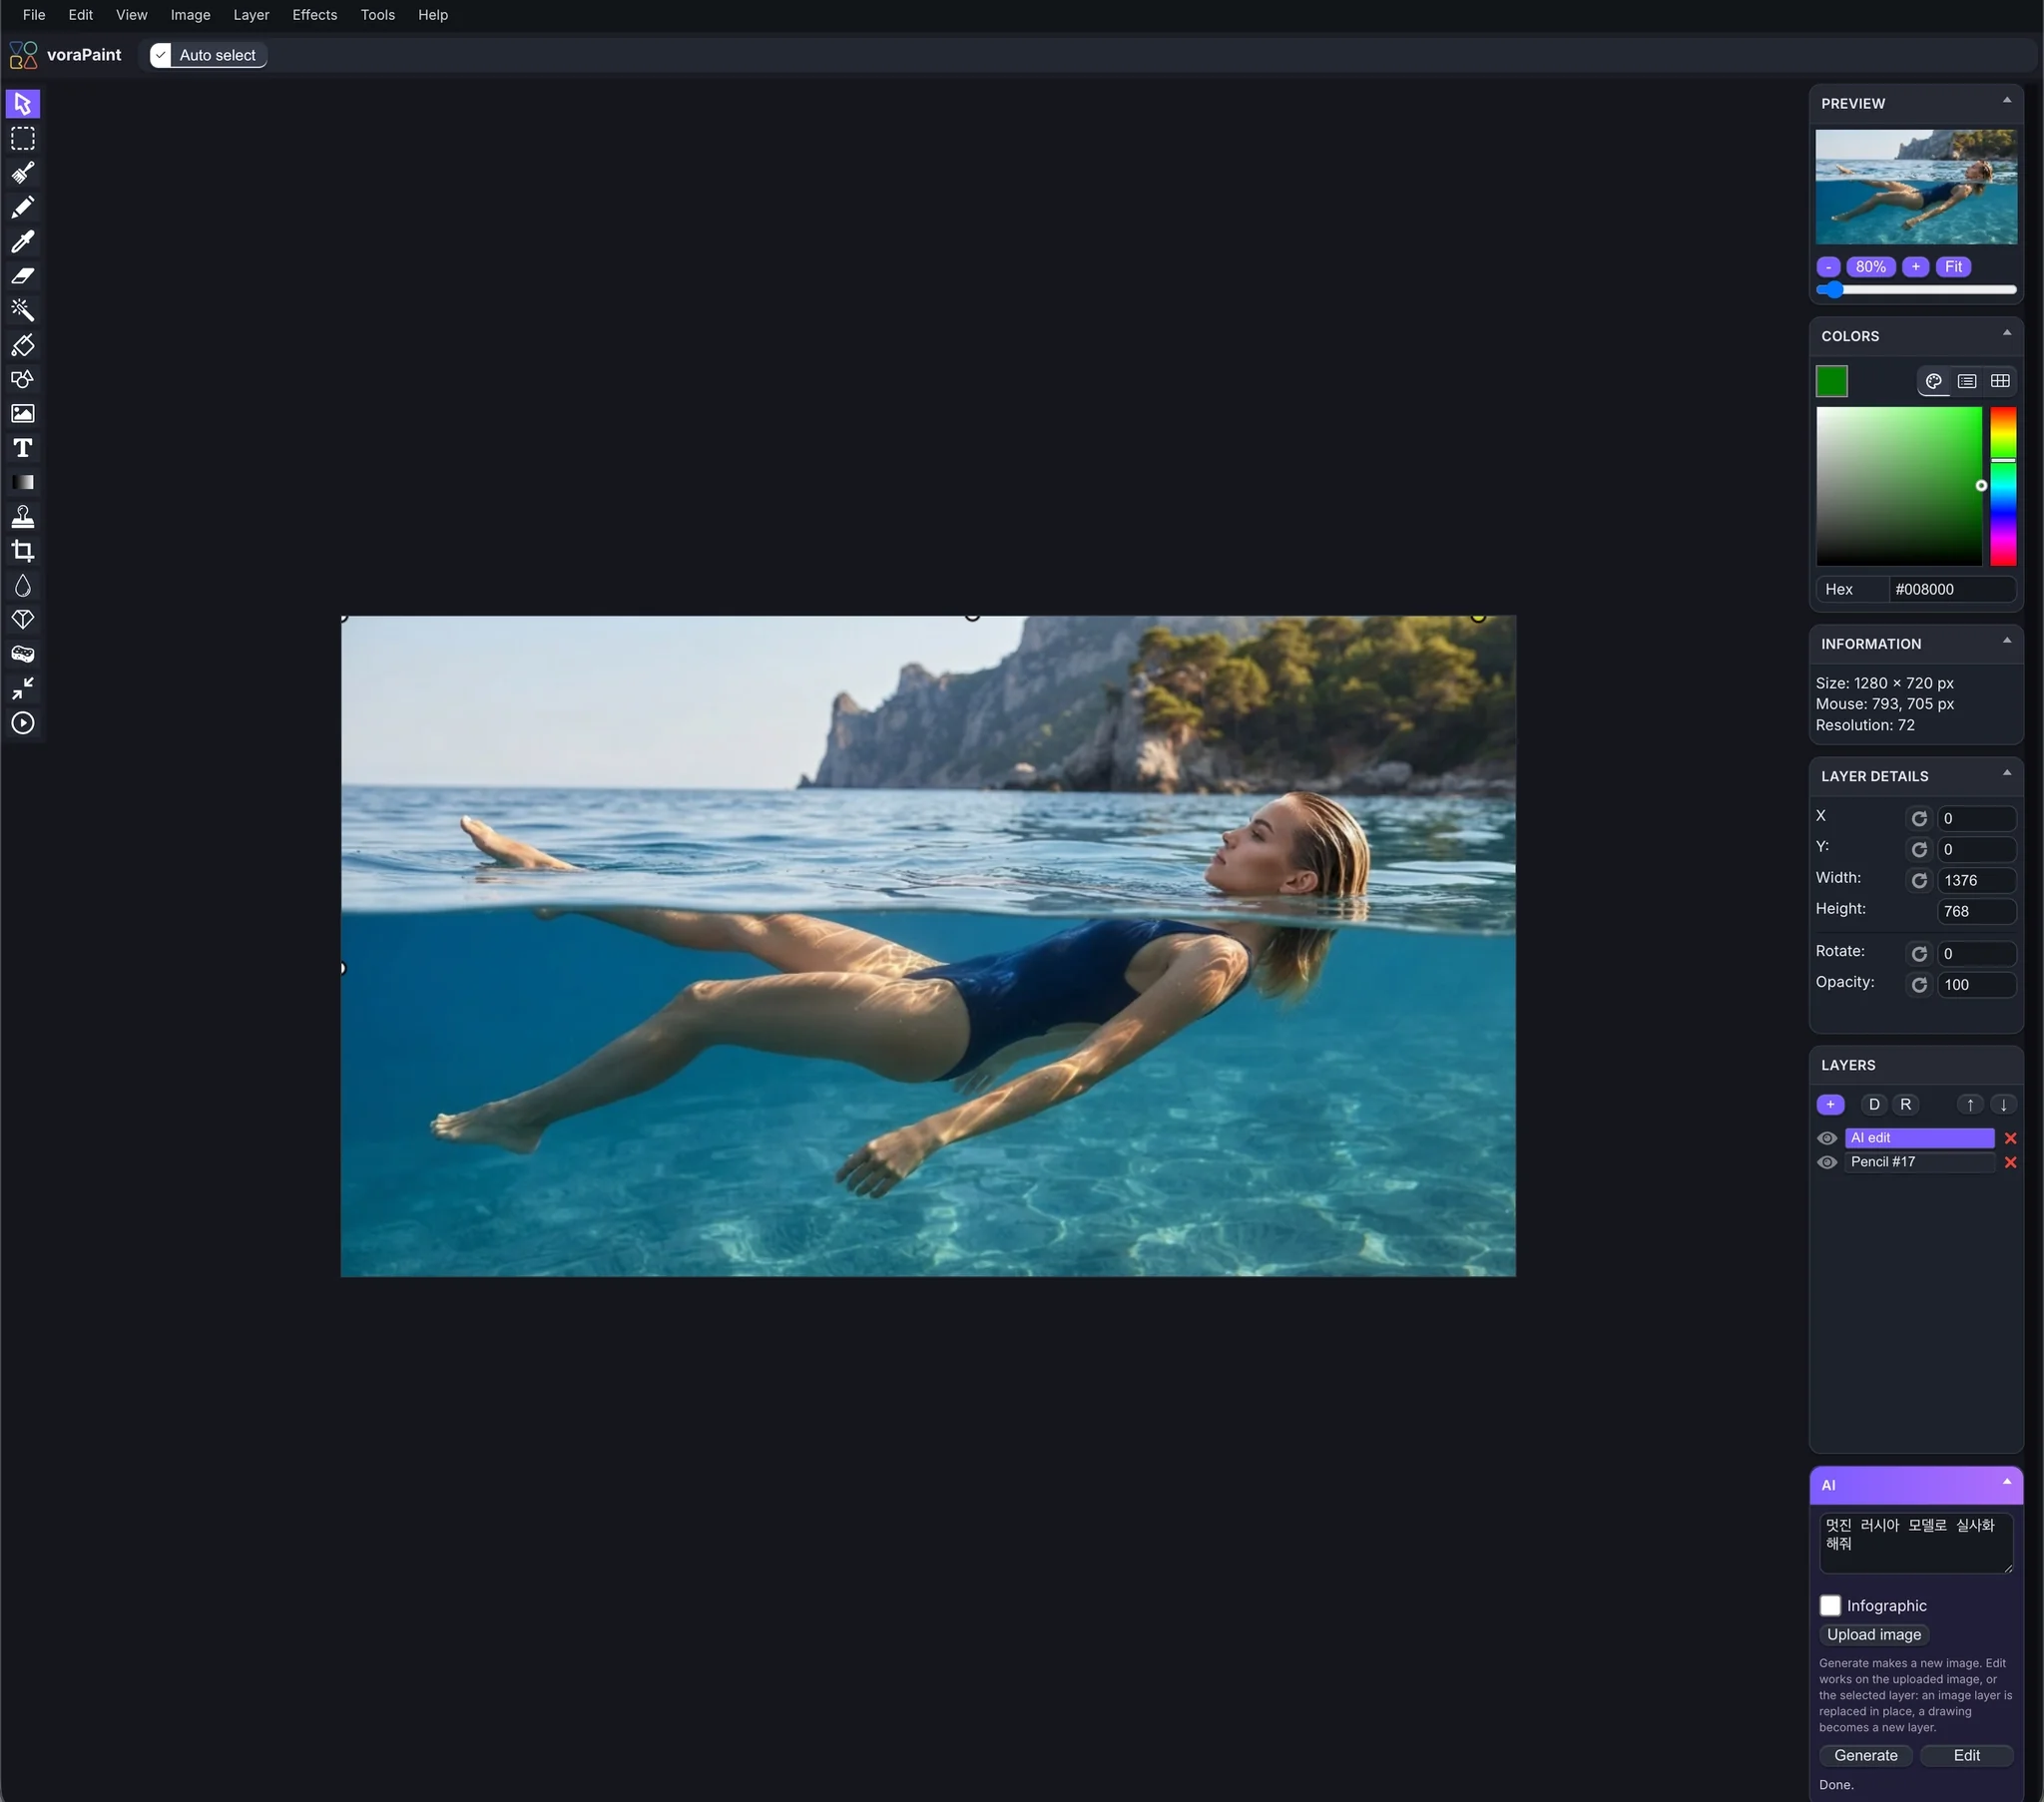
Edit resolves its input from the current state. The priority is an image uploaded in the AI panel, then the selected image layer, a selected text/shape/drawing layer, and finally the full visible canvas.
| Target | How the result is handled |
|---|---|
| AI-panel uploaded image | Adds the edited result as a new layer and clears the upload |
| Selected image layer | Replaces that layer and resizes its box to the result |
| Selected drawing, text, or shape | Rasterizes it on white, edits it, and adds a new layer |
| Nothing selected | Edits the visible canvas and adds a new layer |
07. Compose up to four reference images
- Import each image you want to combine as a separate layer.
- In Layers, hold Cmd on macOS or Ctrl on Windows and click two to four layers in the order you want them used.
- Check the numbered badges and reference list, then describe the role of each source in the prompt.
- Select Edit. The originals stay intact and the composition is added as a new layer.
Example: “Combine the person from reference 1, clothing from 2, and background from 3; preserve facial identity and the product logo; 4:5 advertising photo.” A regular click clears the reference set and returns to single-layer selection.
08. Inpaint: remove, replace, or remove a background
| Mode | How it works |
|---|---|
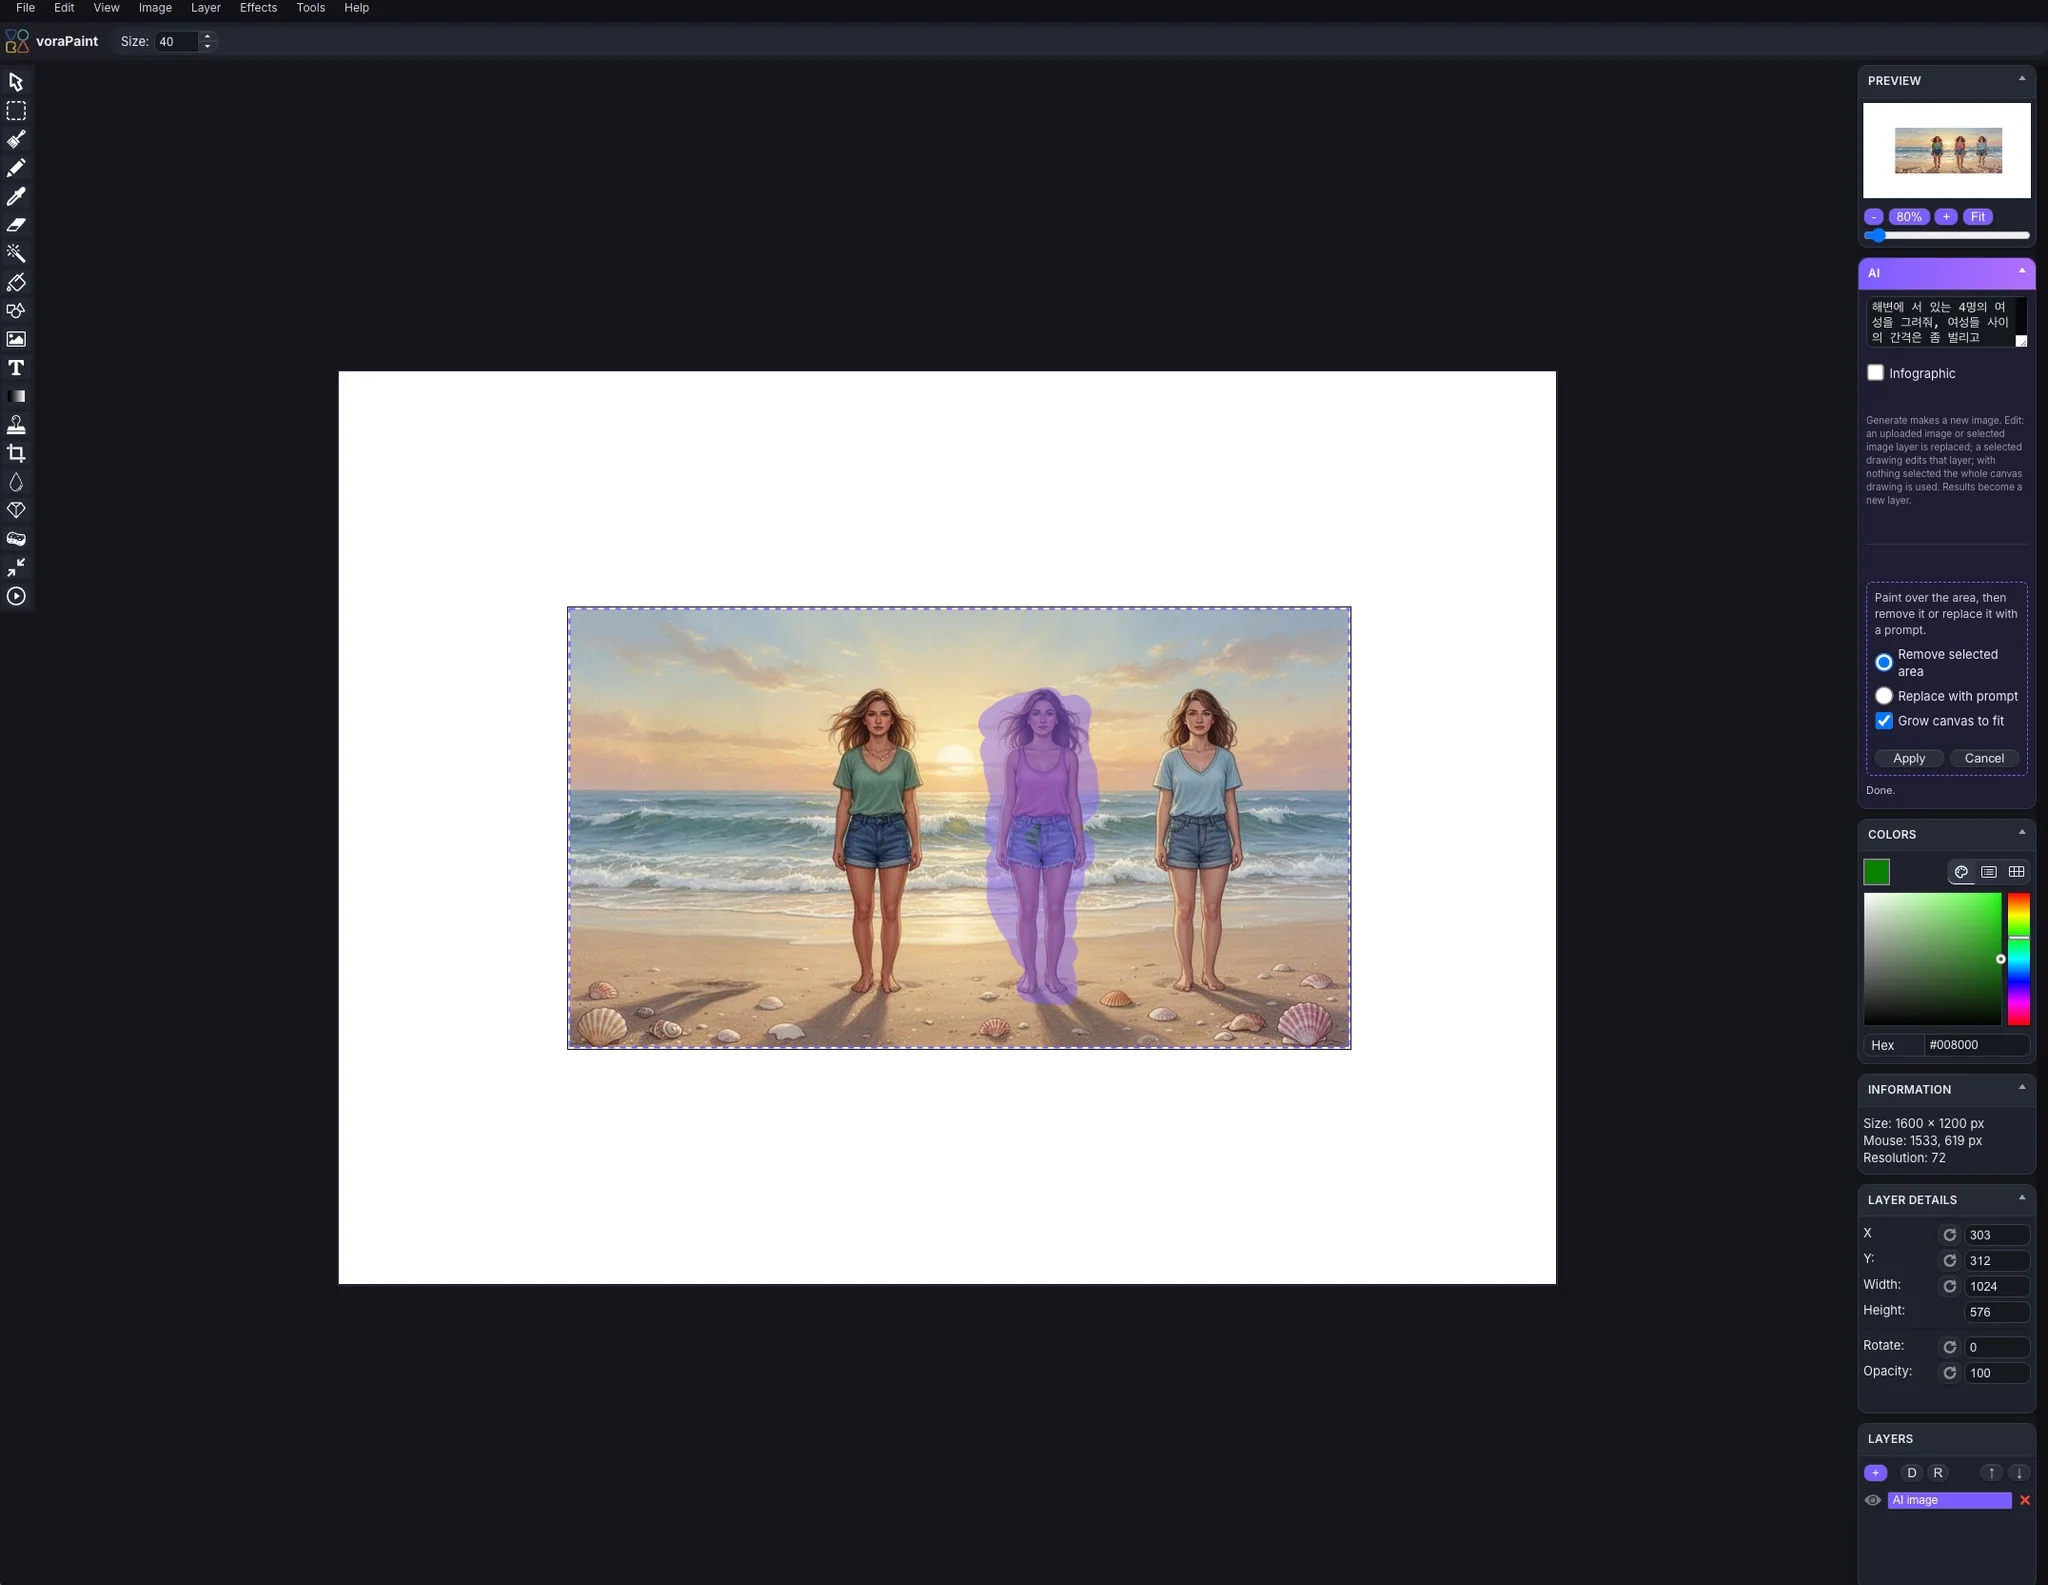
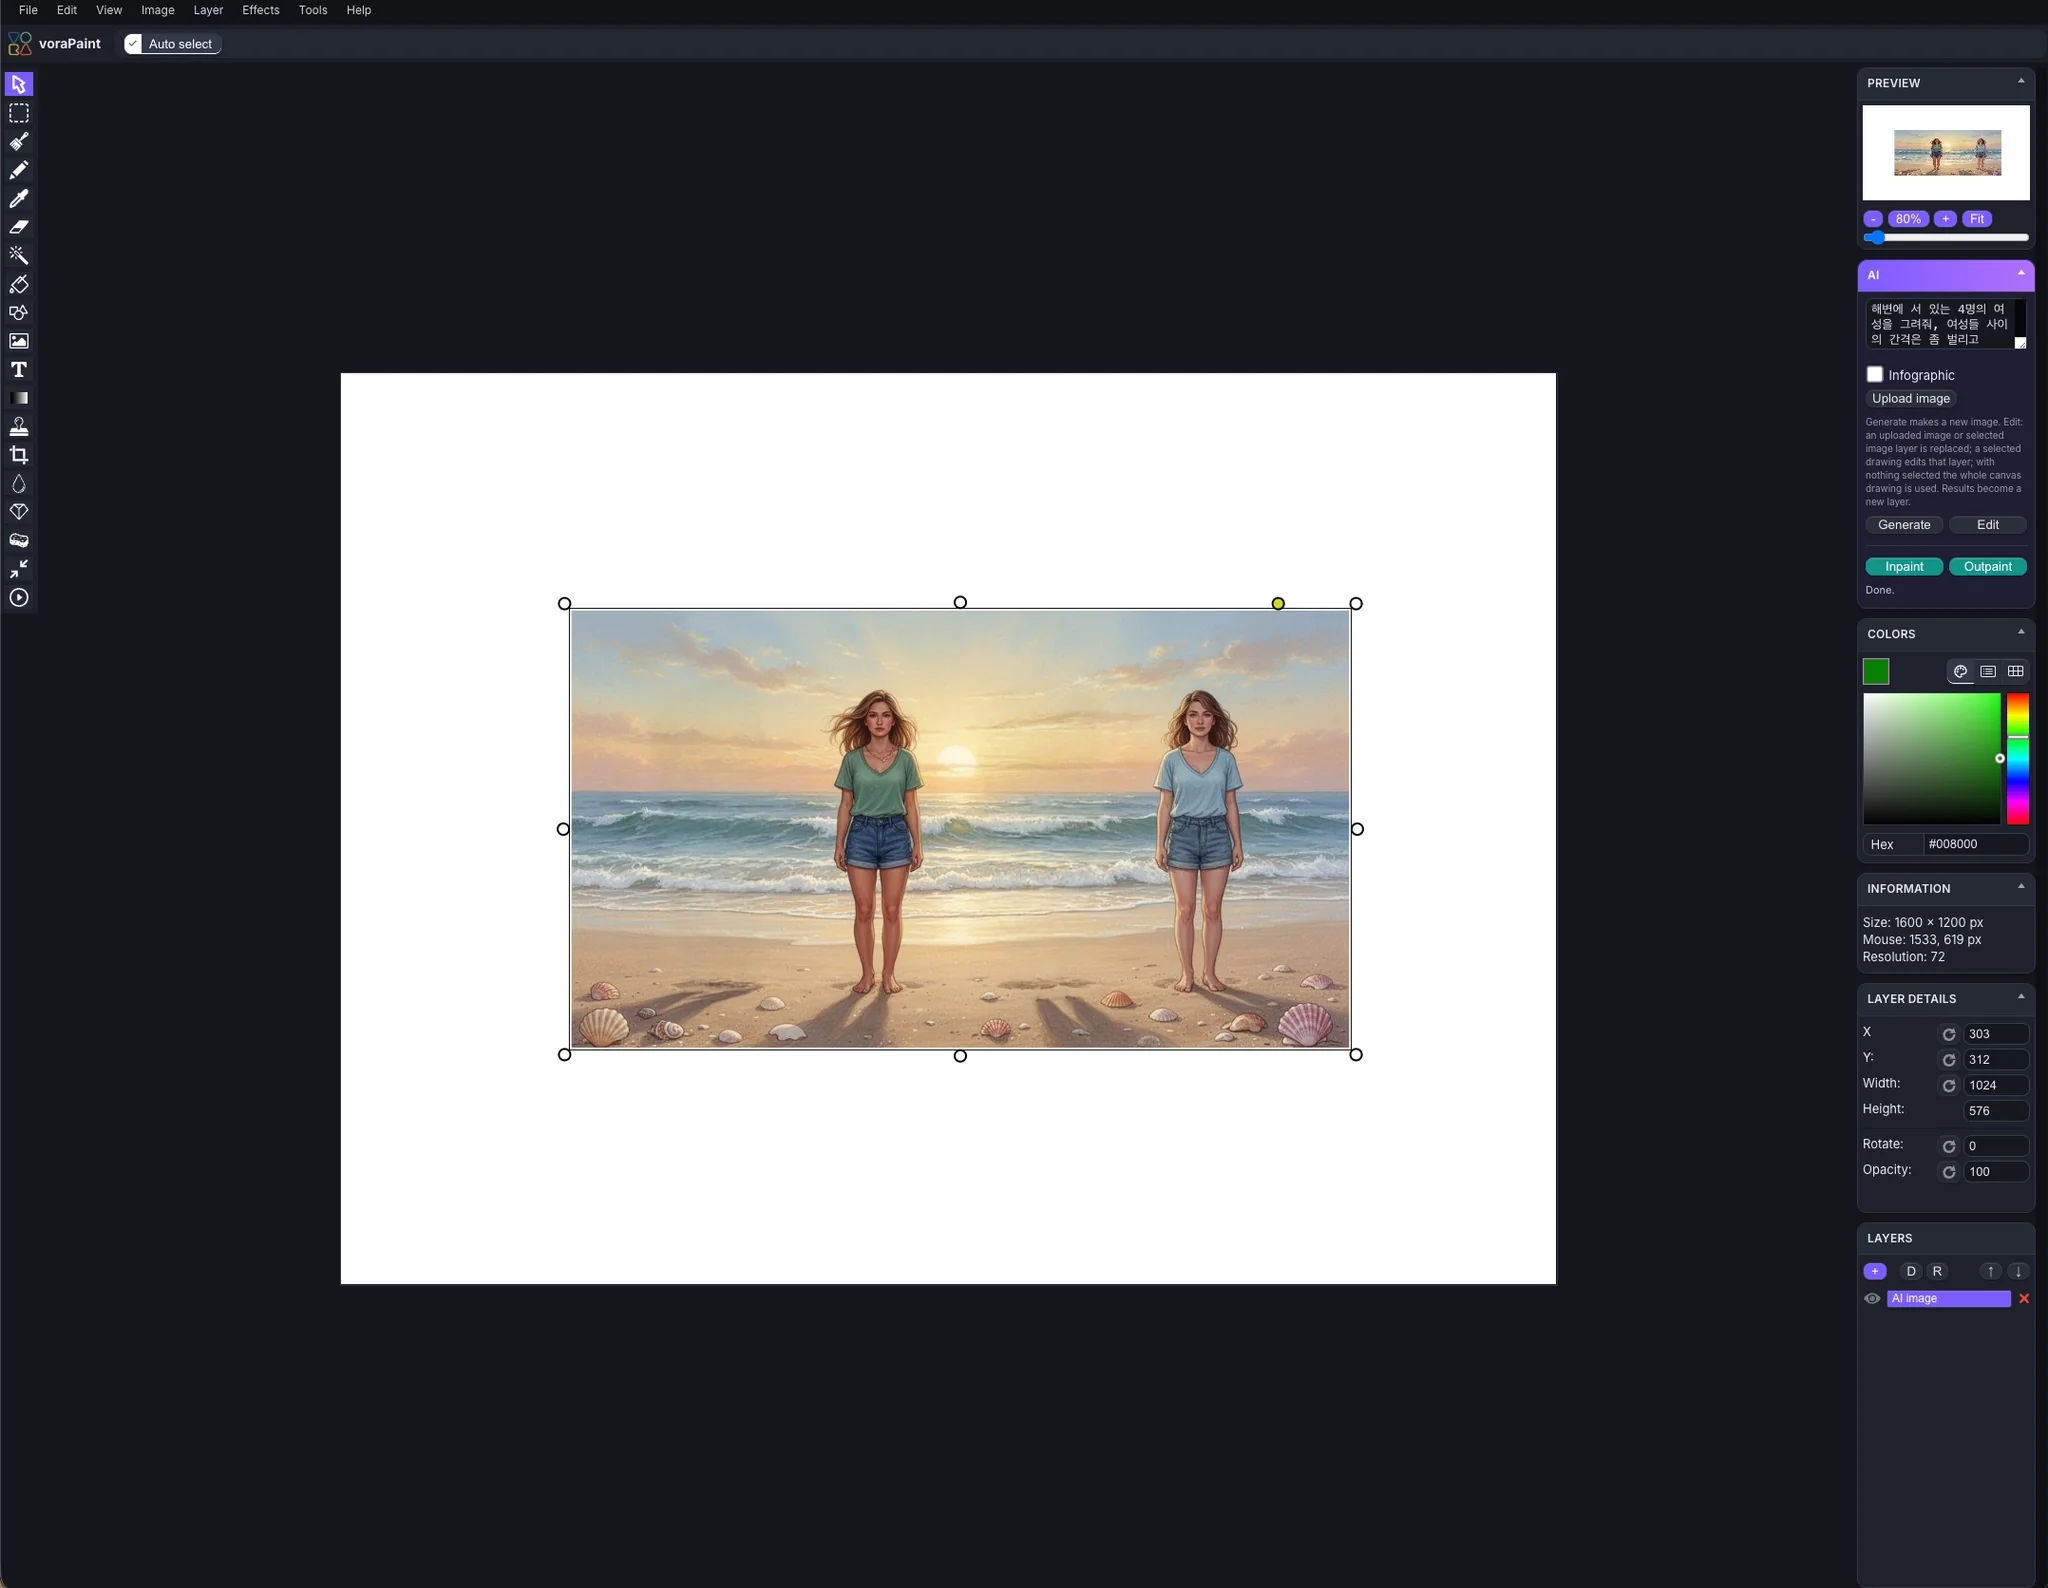
| Remove selected area | Paint a violet mask and apply; the region is rebuilt from its surroundings |
| Replace with prompt | Paint a mask, describe the replacement, and apply |
| Remove background | Remove the entire selected image layer's background without a mask |
- Select an unrotated image layer and choose Inpaint.
- Choose an action and paint slightly beyond the object or region that should change.
- For replacement, describe the new object plus the lighting, angle, and material that must match the surroundings.
09. Outpaint: extend the scene
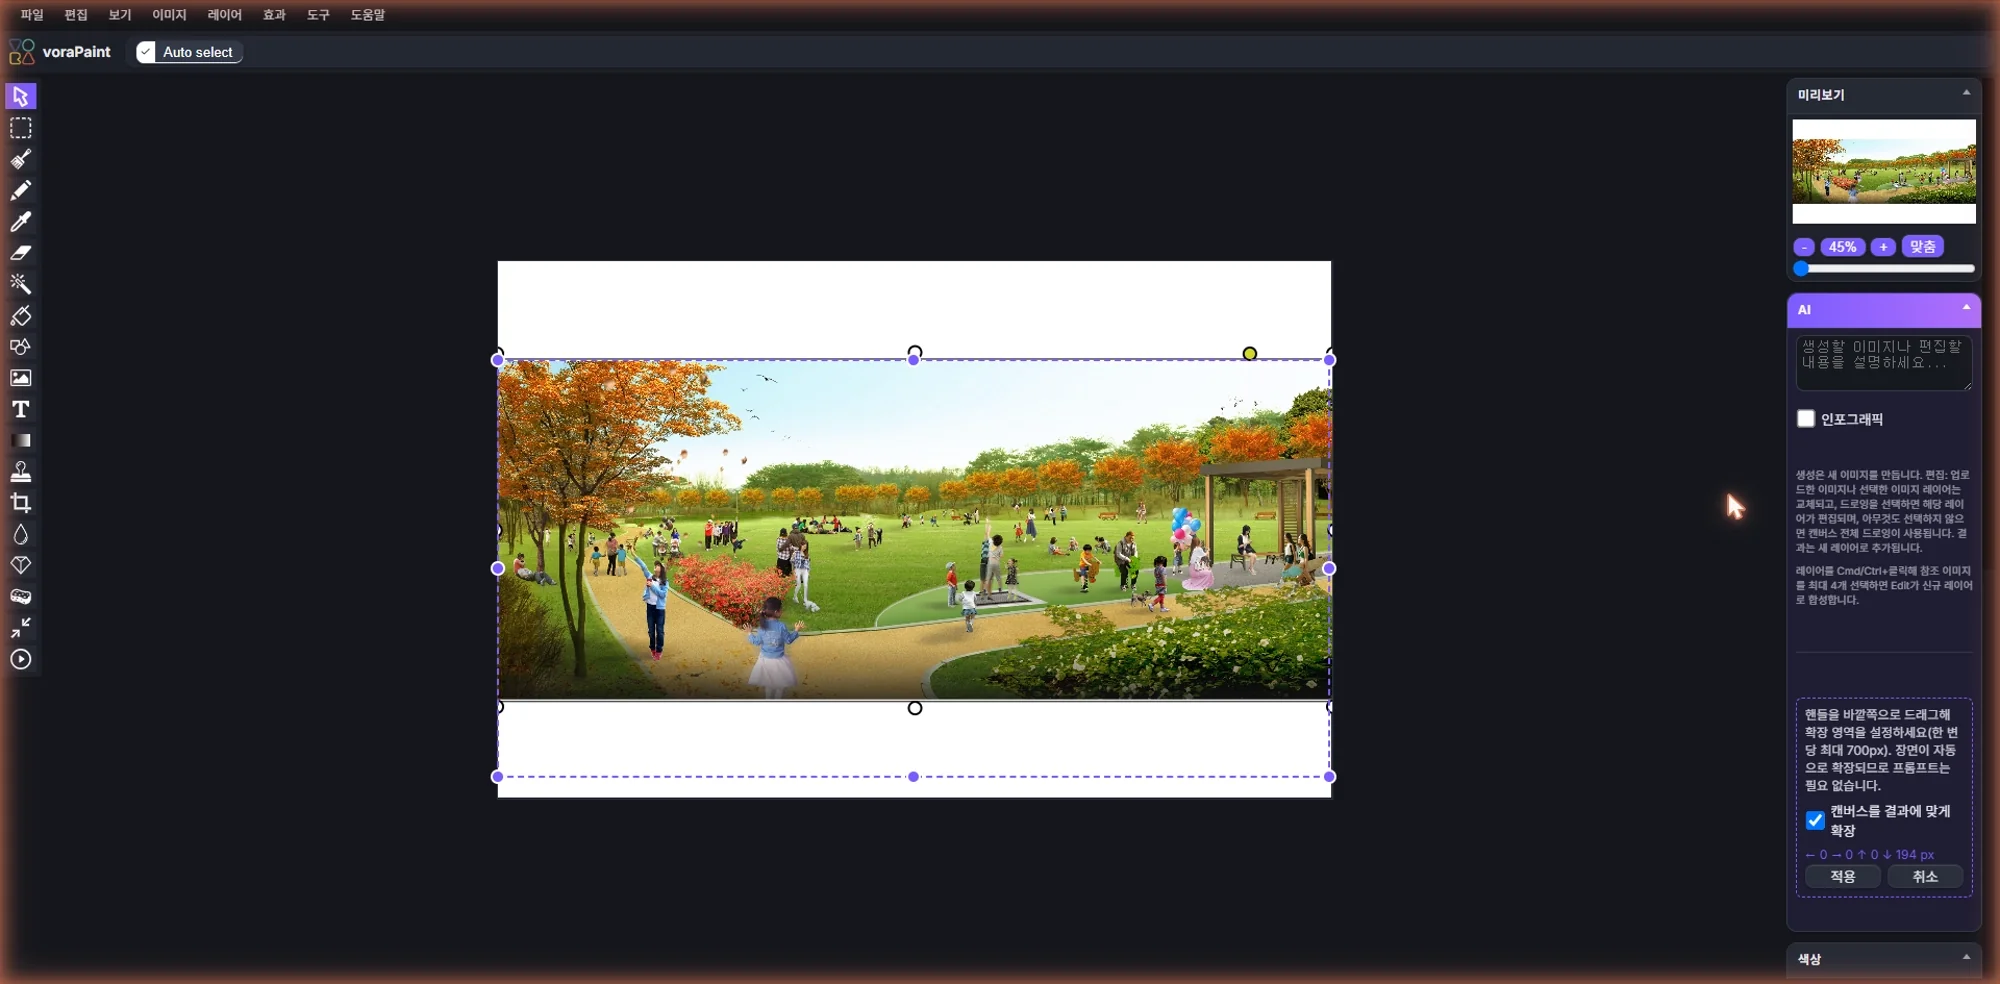
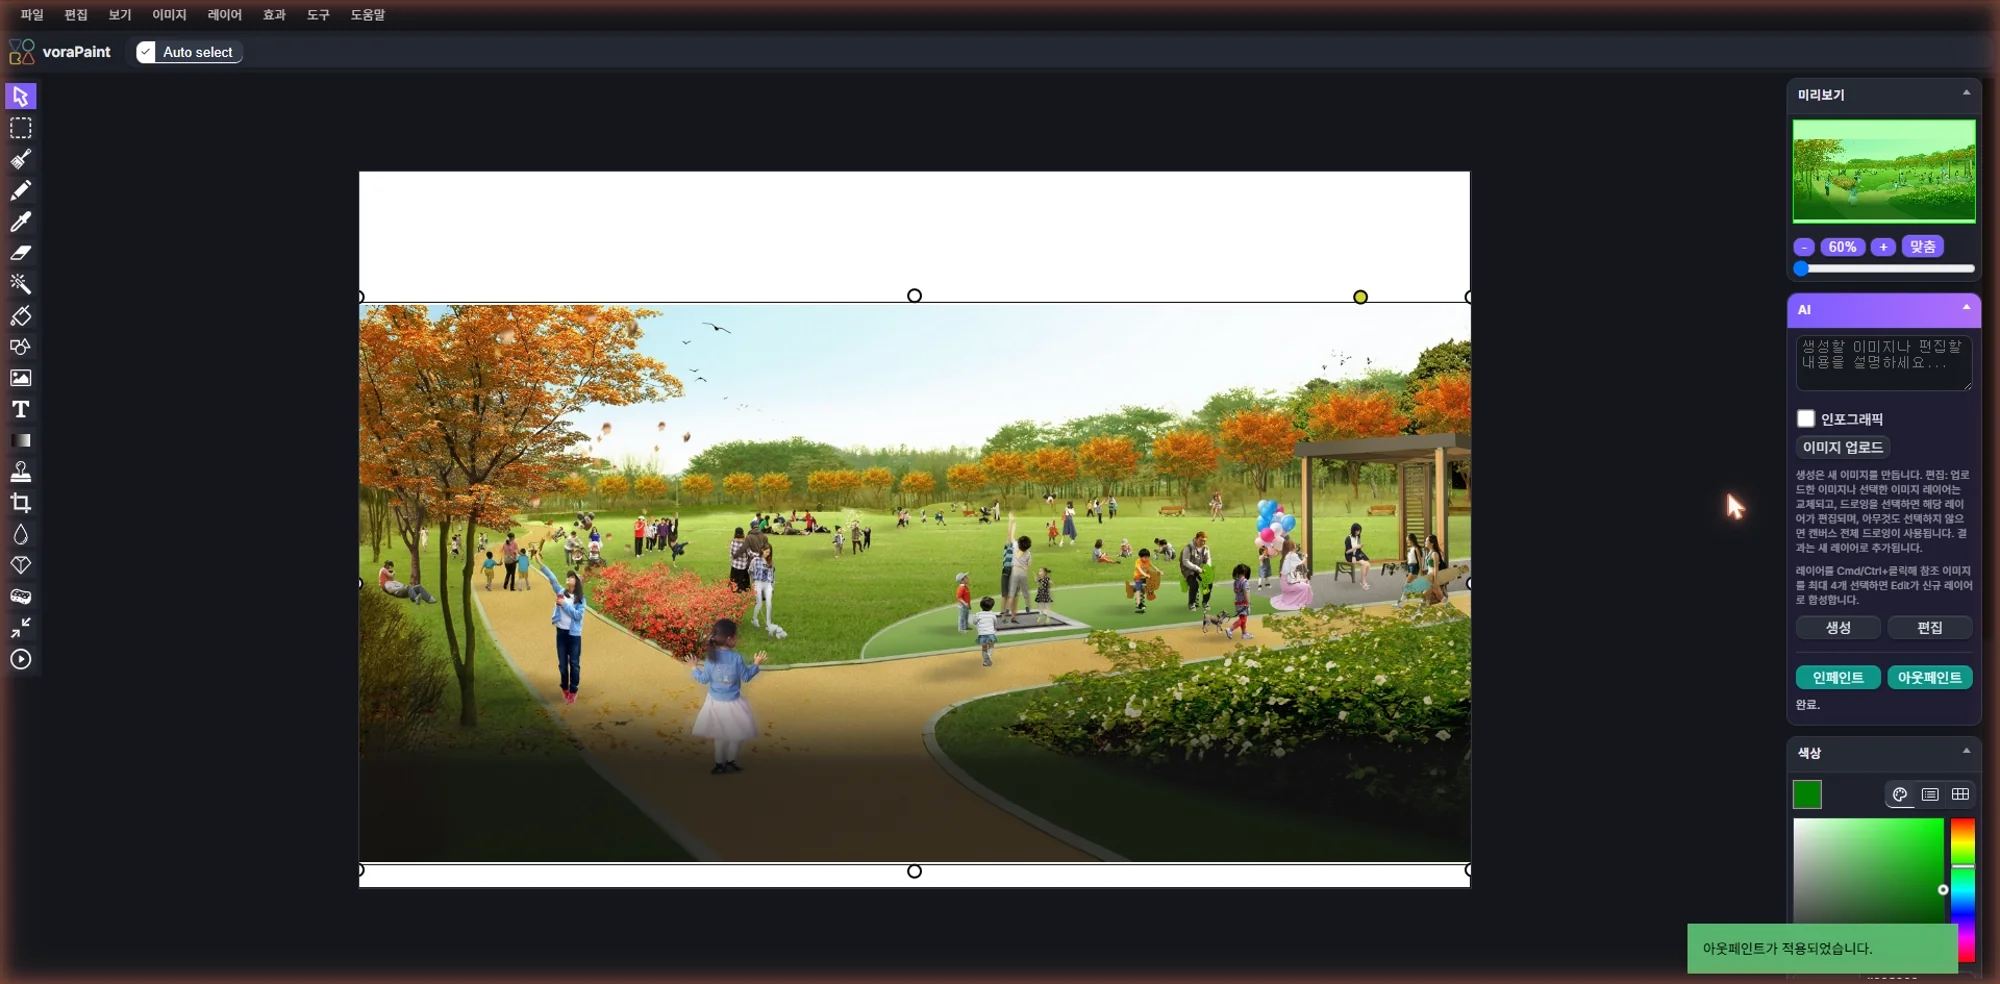
- Select an unrotated image layer and choose Outpaint.
- Drag an edge or corner handle outward to set the left, right, top, and bottom expansion. Each side supports up to 700 px.
- Keep Grow canvas to fit enabled when the expanded scene should remain inside the document boundary.
- Select Apply. AI continues the scene and expands the target layer while keeping the original pixels in place.
10. Layers and nondestructive editing
Layers keep the background, subject, product, lettering, and decoration independent. Rename and reorder them, toggle visibility, and apply an effect to a duplicate so you can compare options while preserving the source.
- Use New, New from Selection, Duplicate, and Delete to separate elements.
- Use Composition and Opacity to control how layers overlap.
- Merge Down combines a local pair; Flatten Image combines the full document.
- When an image-only tool rejects vector or text content, duplicate it and convert the copy to raster.
11. Selection, drawing, and retouching tools
| Goal | Tools |
|---|---|
| Define an area | Rectangle selection, magic wand, crop |
| Draw directly | Pencil, brush, shapes, text, gradient, fill |
| Retouch a region | Eraser, magic eraser, clone, blur, sharpen, desaturate |
| Work with color | Eyedropper, replace color, color zoom, restore alpha |
| Control composition | Grid, guides, ruler, preview, fit window |
12. Image adjustments and effects
The Image menu covers canvas and pixel dimensions, rotation, flips, opacity, brightness, contrast, hue, saturation, luminance, automatic color adjustment, color depth, palettes, and histograms. Effect Browser helps compare filters before applying them.
- Photo cleanup: denoise → small brightness, contrast, and white-balance changes → sharpen
- Mood: vignette, grain, sepia, vintage, and Instagram filters
- Graphic treatments: mosaic, emboss, blueprint, pencil, oil, and dot screen
- Focus: Gaussian, box, and zoom blur plus tilt shift
13. Text, shapes, and precise layout
Keep text and shapes on separate layers, then set exact position, size, rotation, and opacity in Layer Details. Grid and Guides make margins and alignment consistent across cards, banners, and thumbnails.
- Letters generated inside an AI image are pixels and are hard to edit precisely. Generate the background first, then place exact copy with the Text tool.
- Add logos, prices, captions, and any other exact content as separate layers near the end.
- If rotation makes a tool unavailable, preserve the original and work on a rasterized duplicate.
14. Write a strong image request
| Element | What to specify |
|---|---|
| Purpose | Product page, presentation cover, social ad, infographic, and so on |
| Scene | Main subject, action, background, time, weather |
| Composition | Aspect ratio, viewpoint, placement, open space, focus |
| Treatment | Photo or illustration style, palette, light, material |
| Preserve or exclude | Faces, logos, and products not to change; elements not to add |
| Output | On-image text language, final use, transparency |
An edit request should say both what changes and what stays. Example: “Change only the bag to deep navy. Preserve its shape, metal logo, the person's hands, and the background lighting.”
15. Undo, redo, and shortcuts
AI Edit, Inpaint, and Outpaint bundle their related image and geometry changes so one Undo restores the previous state. Duplicate a layer and use Quick Save before a major operation.
| Key | Action | Key | Action |
|---|---|---|---|
| Ctrl/Cmd+Z | Undo | Ctrl+Y | Redo |
| O | Open | S | Export |
| Shift+S | Save As | F9 / F10 | Quick Save / Load |
| N / D | New layer / Duplicate | G | Toggle grid |
| R / T | Resize / Trim | Scroll wheel | Zoom |
16. Export and Save to VORA
| Method | When to use it |
|---|---|
| Export or Save As | Download a finished PNG, JPG, WEBP, BMP, TIFF, GIF, or another image format |
| Layer JSON | Preserve the layer structure for later editing |
| Save to VORA | Register a flattened PNG under My AI Generated Files for later access in VORA |
| Quick Save | Temporarily restore work in the current browser |
Find VORA-saved files under Settings → My AI Generated Files. If the workspace reports a file-size or storage limit, remove files you no longer need or reduce the canvas and image dimensions before saving again.
17. Recommended workflows
| Goal | Recommended sequence |
|---|---|
| Advertising image | Generate background → compose product and person references → clean with Inpaint → add exact copy as text layers → export PNG or JPG |
| Photo retouching | Duplicate source → remove distractions with Inpaint → correct color → denoise and sharpen → compare with source |
| Finish a sketch | Select sketch layer → Edit with style, material, and light → Inpaint details → adjust effects and color |
| Change aspect ratio | Select source layer → Outpaint in the needed direction → fit canvas → crop and align |
| Infographic | Generate from structured facts and language → verify figures and spelling → cover incorrect lettering and replace it with text layers |
18. Troubleshooting and final review
| Symptom | What to check |
|---|---|
| Edit appears in the wrong place | Check the AI upload and active layer; clear an upload you no longer intend to use |
| Inpaint or Outpaint will not start | Select an image layer, confirm it is not rotated, and rasterize a copy if needed |
| Reference composition does not run | Cmd/Ctrl+click two to four visible layers |
| An AI request fails or takes a long time | Avoid repeated clicks while busy, retry later, and wait if a usage-limit message appears |
| The launch link does not open | Confirm the one-hour window and original browser, then request a new @vpaint link |
| Save to VORA is rejected | Check file and storage limits; reduce the image or export locally |
- Inspect faces, hands, lettering, logos, product shapes, and mask boundaries at 100% zoom.
- Review factual accuracy, rights, personal information, and the policies of the destination where the image will be used.
- Open the final file and confirm its dimensions, ratio, transparency, color, and save location.