
Image Workspace
An AI image workspace that turns your words into pictures — even if you can't draw
VORA Chat and Tool Demo
Image Workspace — workflow demo
An AI image workspace that turns your words into pictures — even if you can't drawChoose a real request from this guide and preview the flow from input to result.
This demo stays in your browser; it sends, saves, and charges nothing.
ⓘ The demo shows filenames only and uploads nothing.
Send a request to see the processing flow and output format for this tool.
@vpaint Create a warm illustration of a beach at sunset
- 1Check request scope
- 2Create draft or session
- 3Prepare dedicated workspace
- 4Return new-tab URL
VORA chat input@vpaint Create a warm illustration of a beach at sunset
https://guide.vora.im/en/tools/image-workspace/#workspace-demoOpen in a new tab ↗ ⓘ The live workspace link is valid for one hour.
Live results vary with the source material, request, and time of use.
What is the Image Workspace tool?
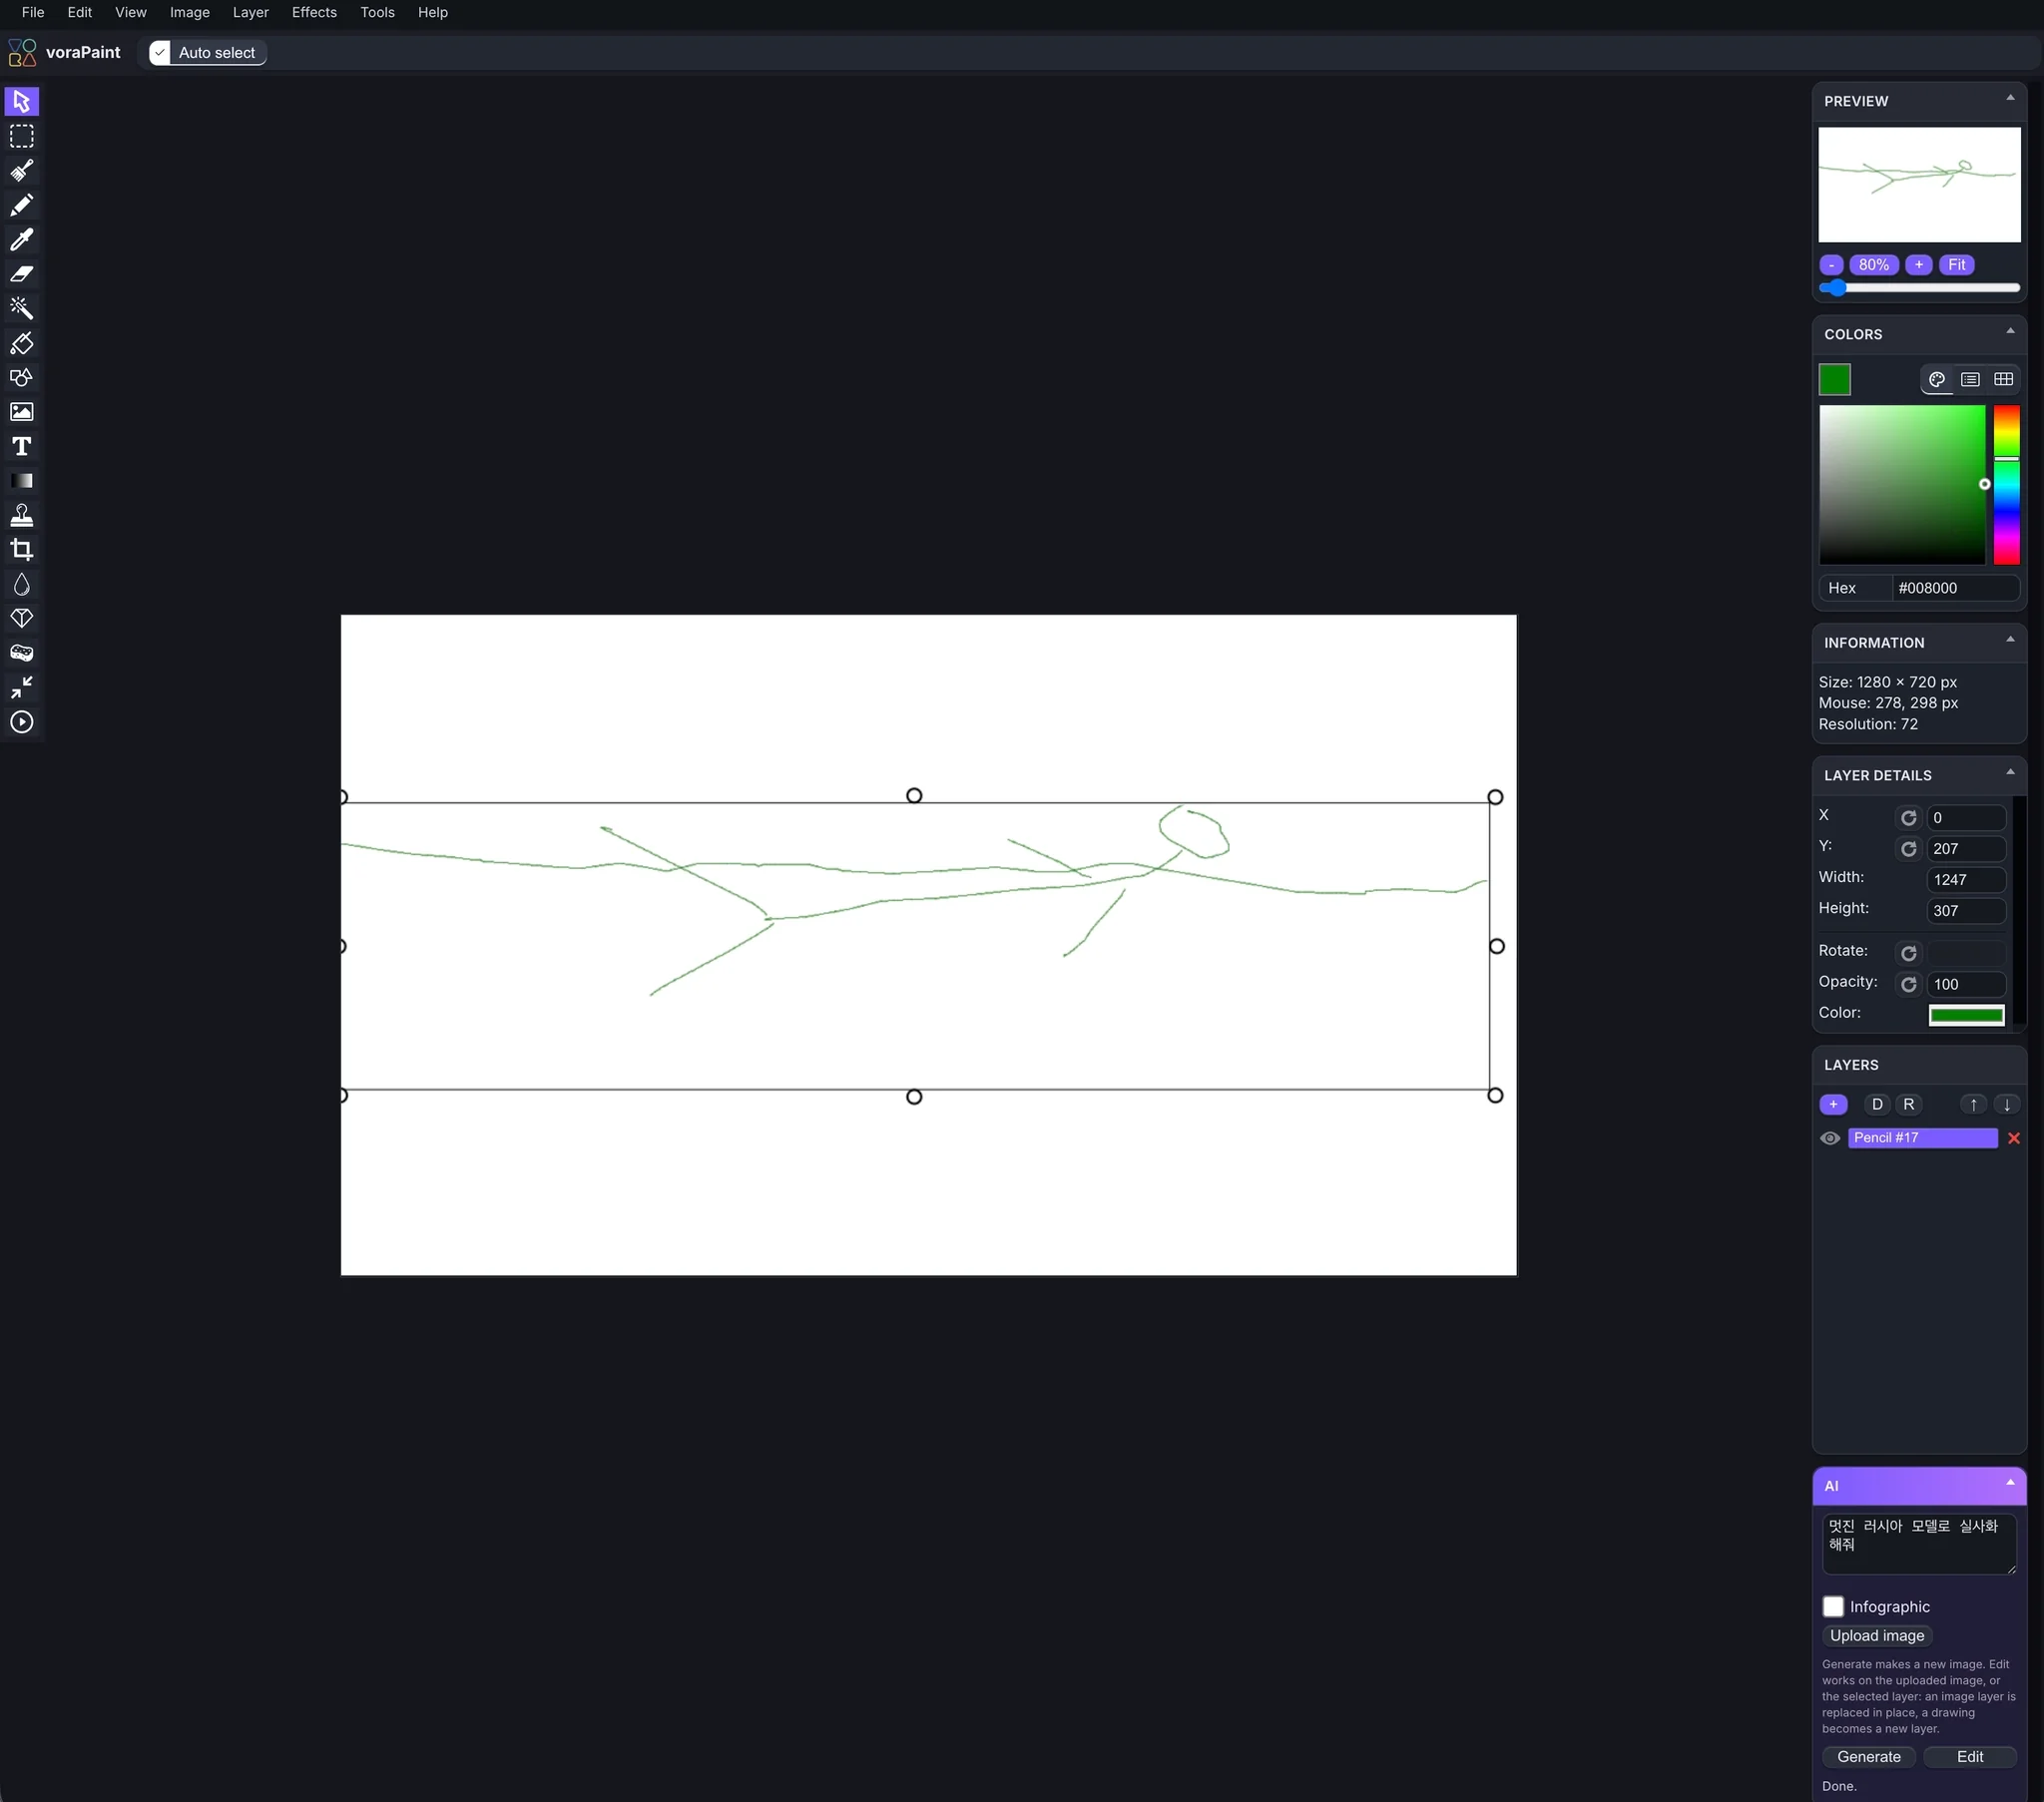
An AI image workspace that turns even a hopeless doodler into a pro. Just describe the picture you want in words, and the AI draws it for you — and anything you don't like, you can fix right on the spot. Turn a rough sketch into a photorealistic image, erase only the unwanted part of a photo, or extend an image's background sideways — no Photoshop skills needed, just ask in plain words.
Type @vpaint and a dedicated editor opens in a new tab, where you can go from generating an image all the way to fine editing in one place.
Key Features
This tool splits broadly into "make it with AI" and "refine it yourself."
- Generate from text (Generate): Describe a scene like "a seaside at sunset" and the AI creates a new image.
- Transform your sketch or photo with AI (Edit): Ask to turn a rough drawing or an imported photo "into photorealistic" or "into watercolor," and it converts to that look. Even a clumsy doodle becomes a finished picture.
- Fix just a part (Inpaint): Paint over only the area with an unwanted person or object, and it naturally removes or replaces just that part.
- Extend beyond the image (Outpaint): Naturally continues a cropped background in any direction to widen the frame.
- Make infographics: Automatically generates content as an infographic with title, sections, and icons.
- Professional editing tools: It also has the features of a regular image editor — brushes, erasers, layers, filters — so you can fine-tune AI results in detail.
📷 Feature Preview
① Rough sketch → photorealistic image (before / after)
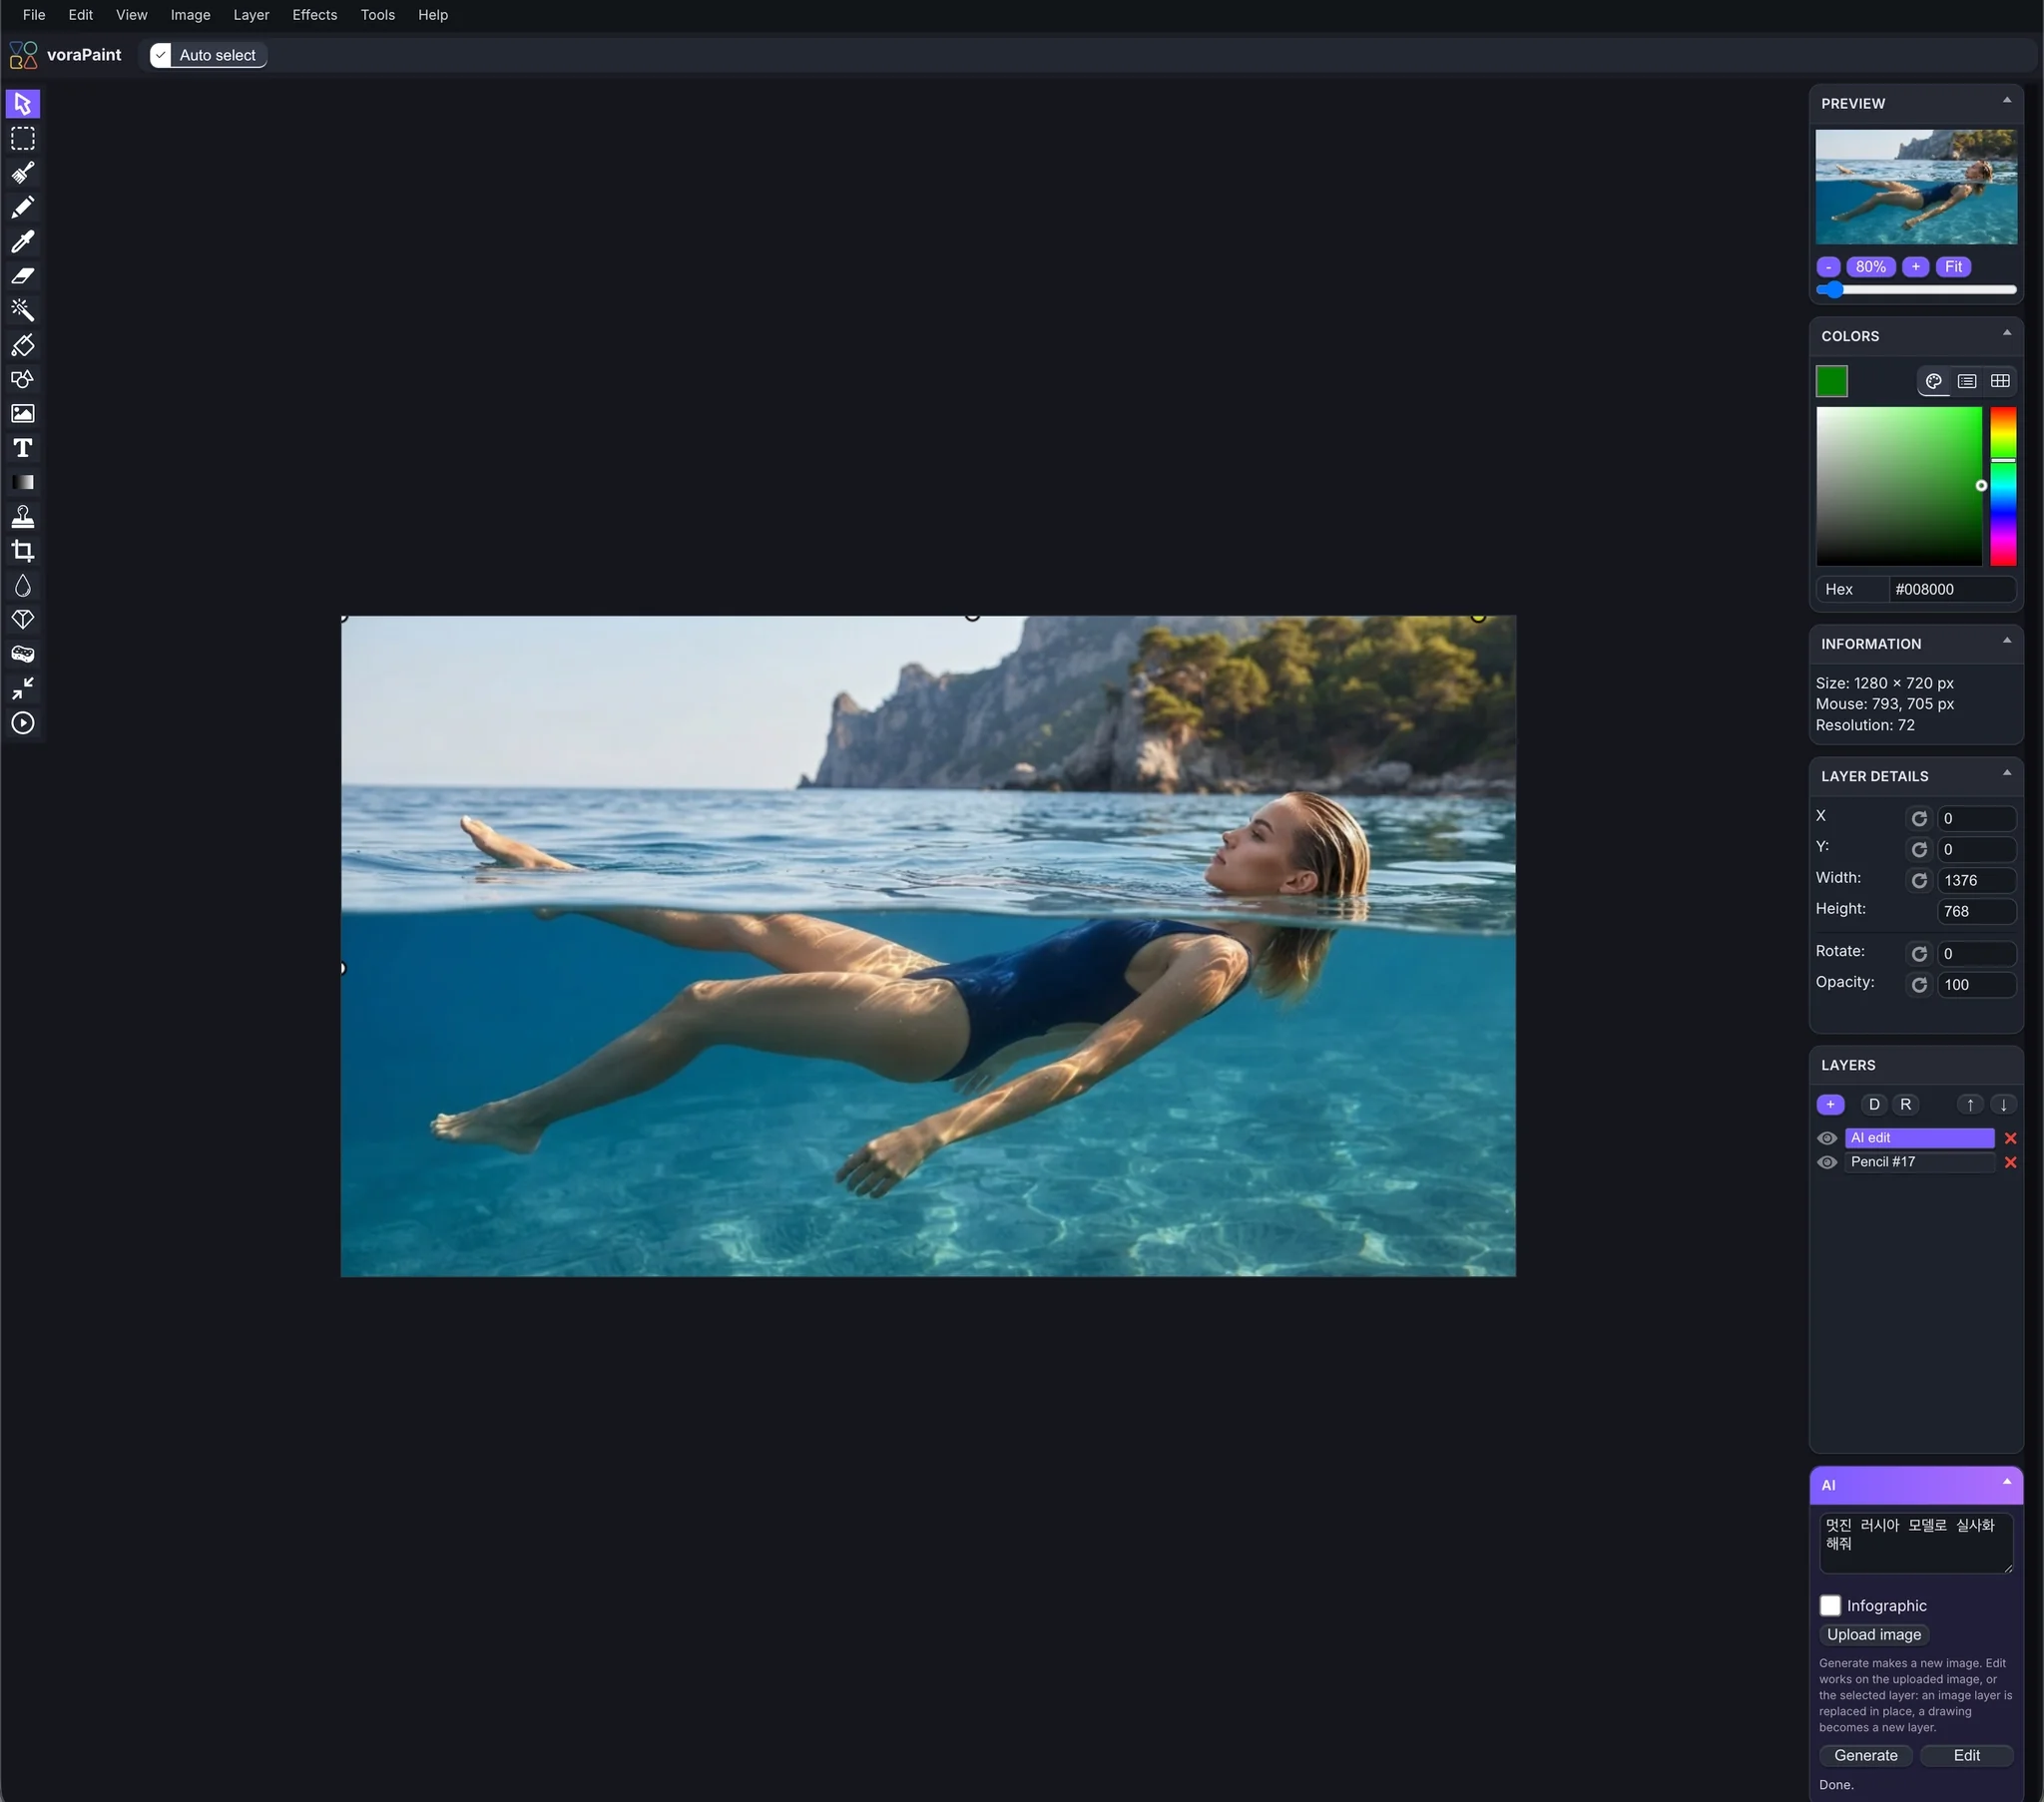
② Removing a person/object with Inpaint
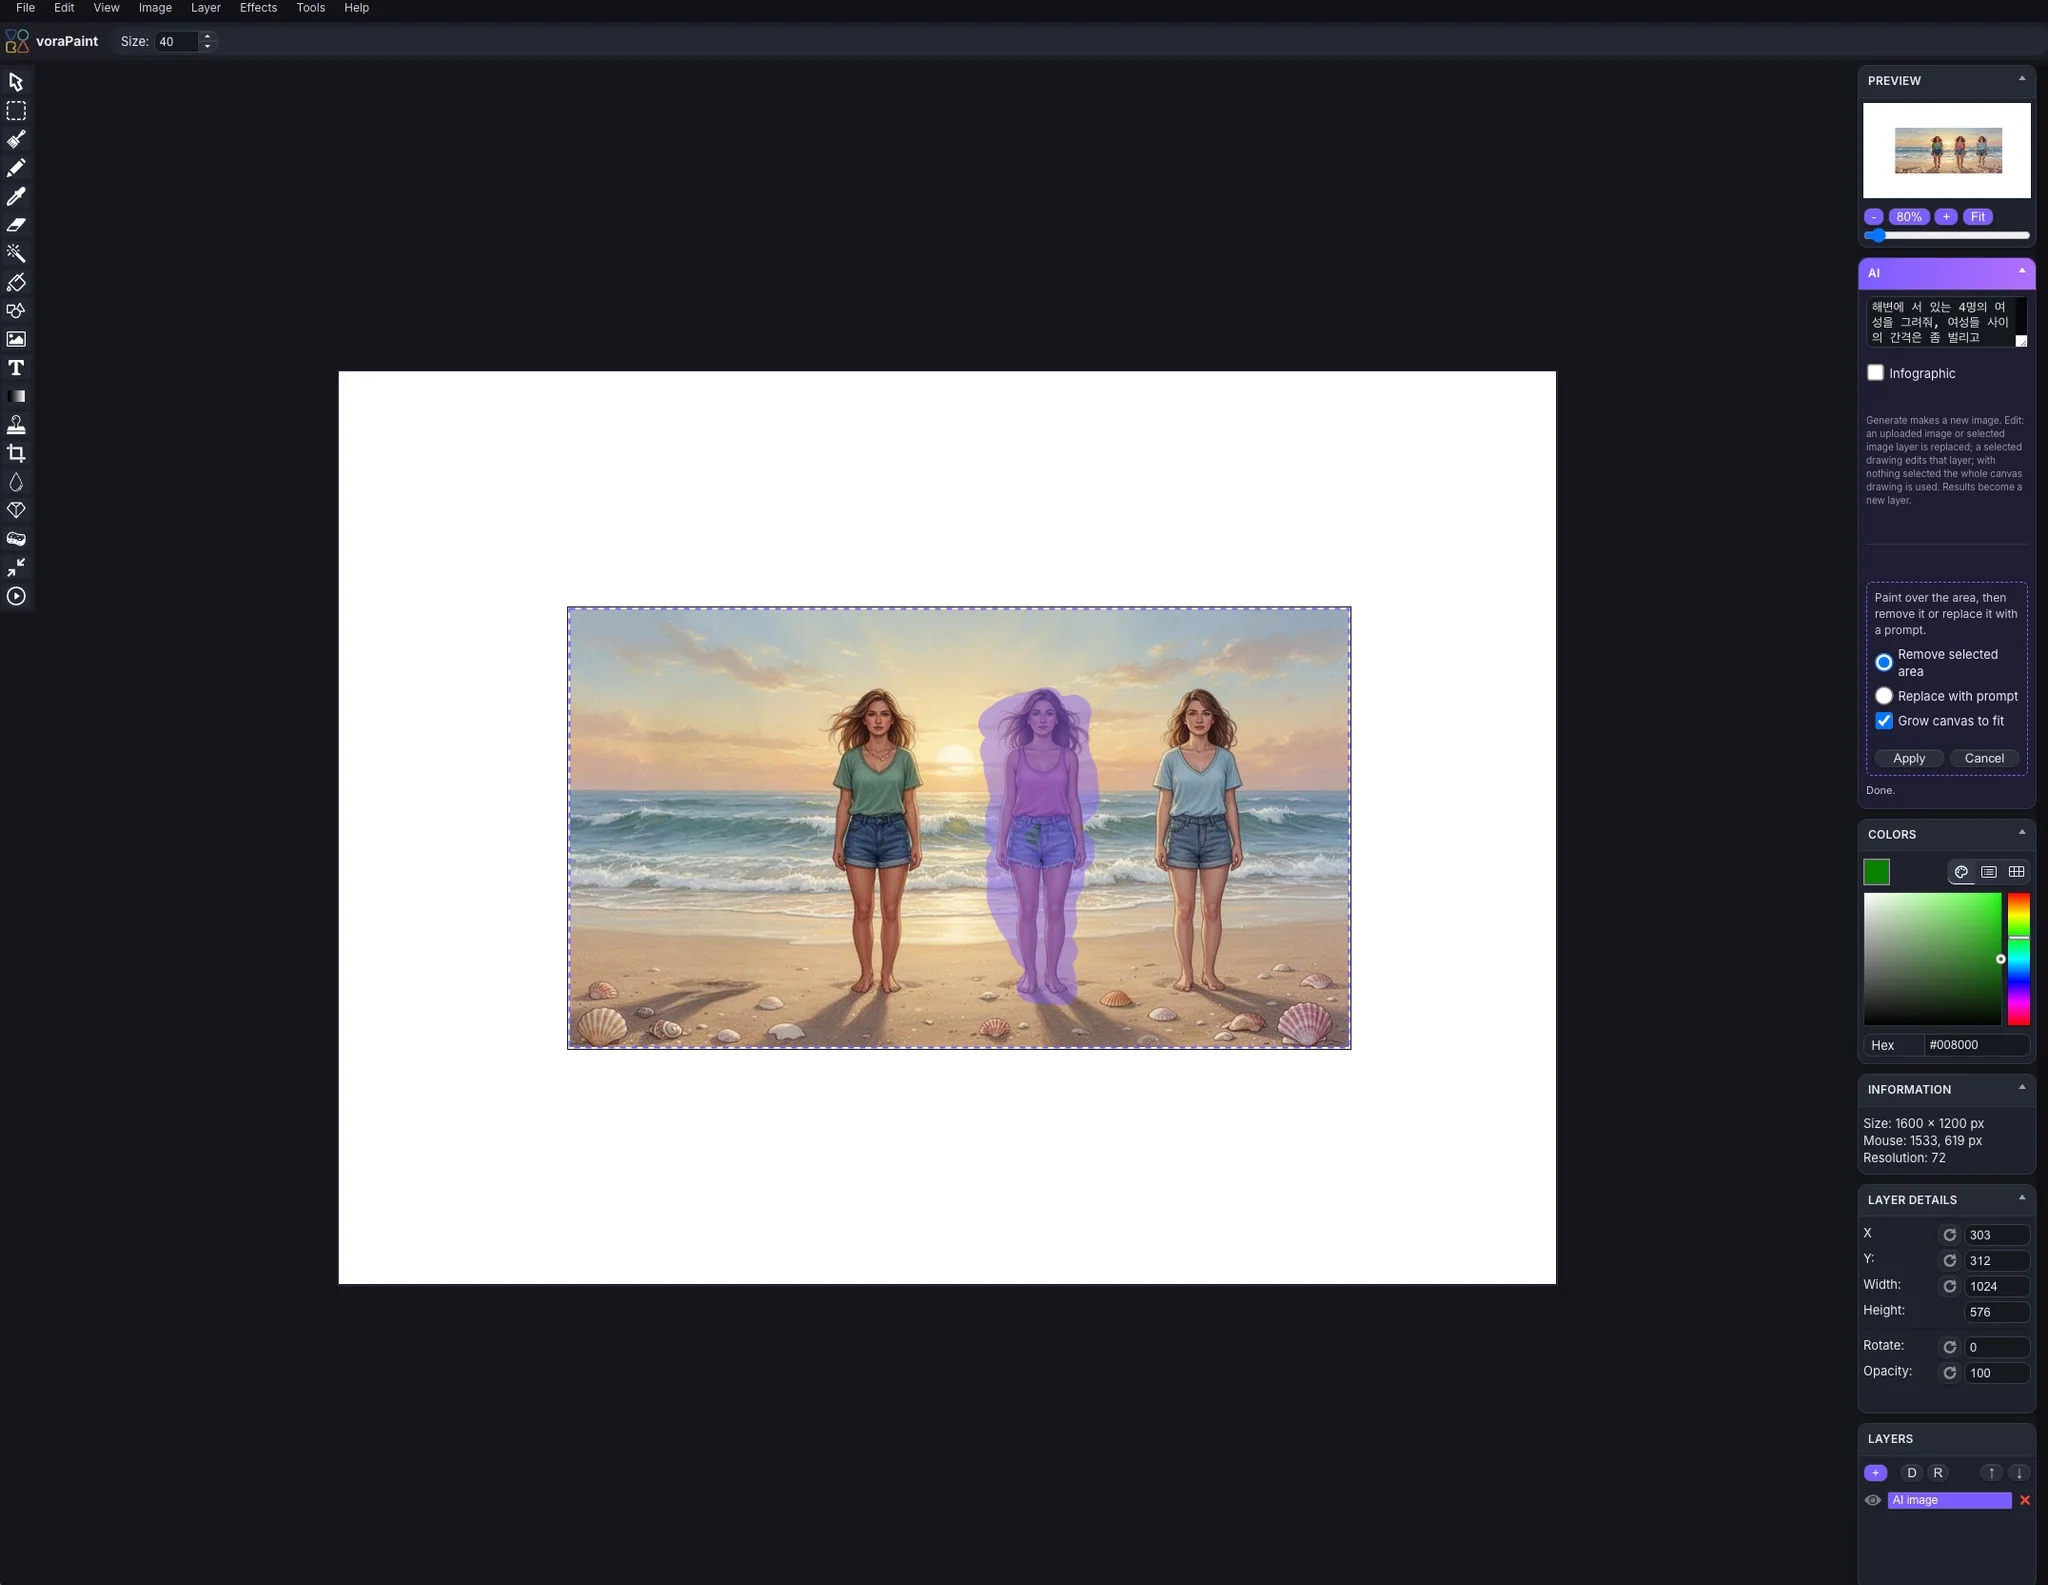
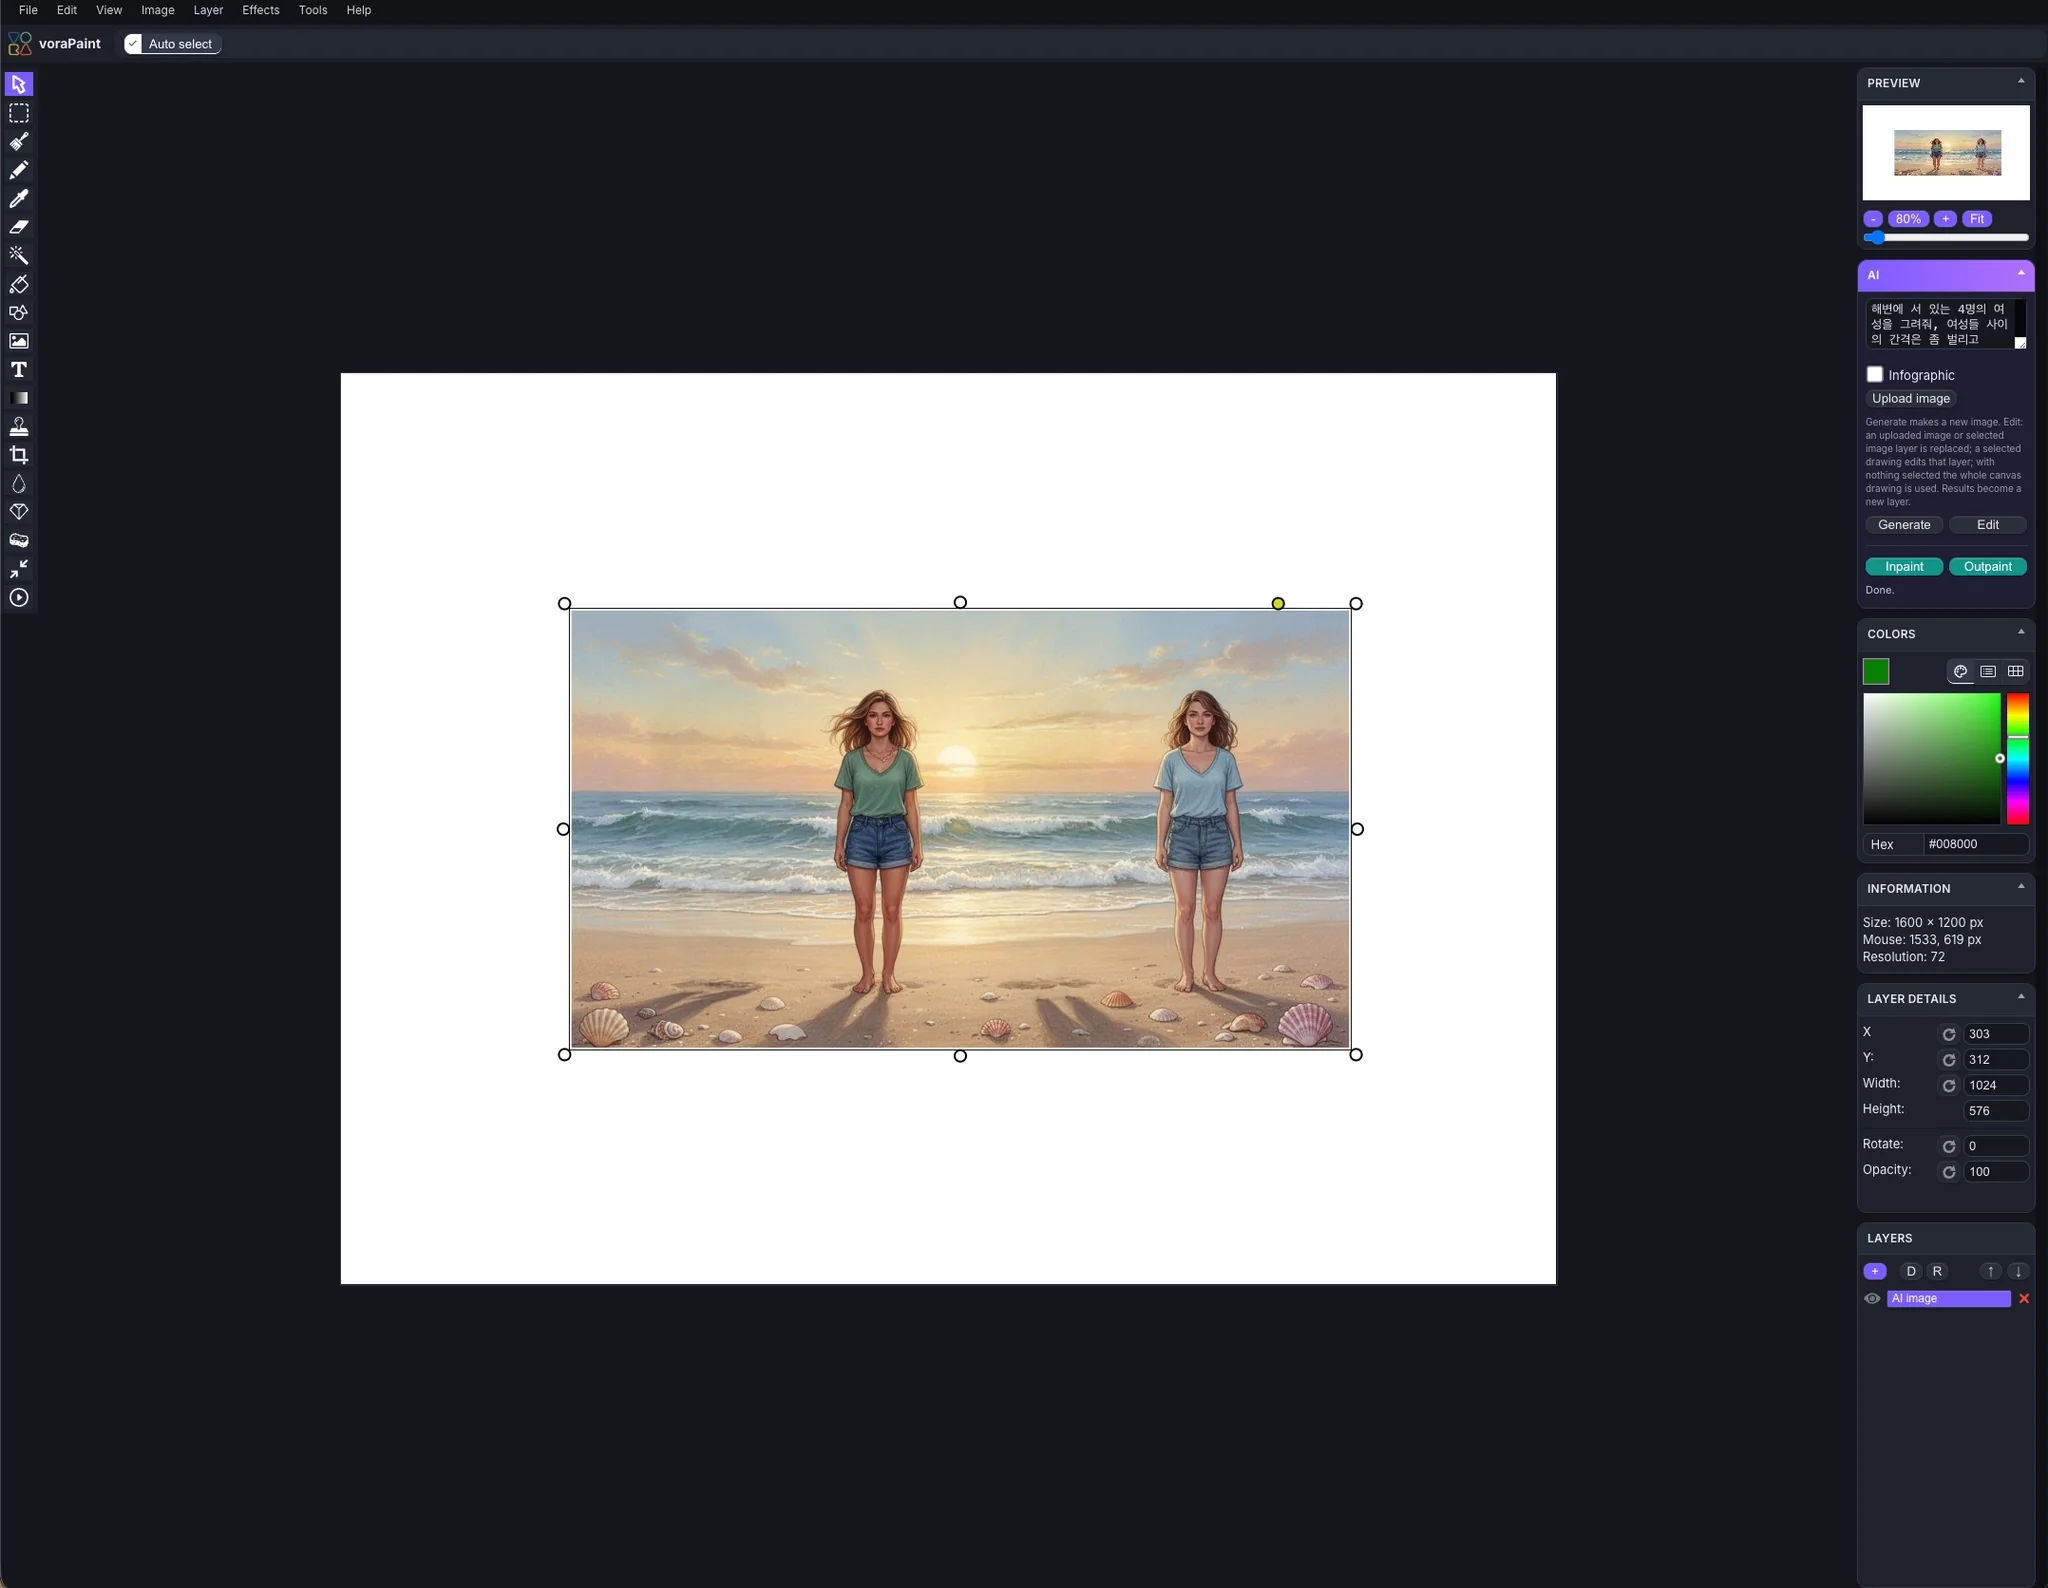
③ Extending the background with Outpaint
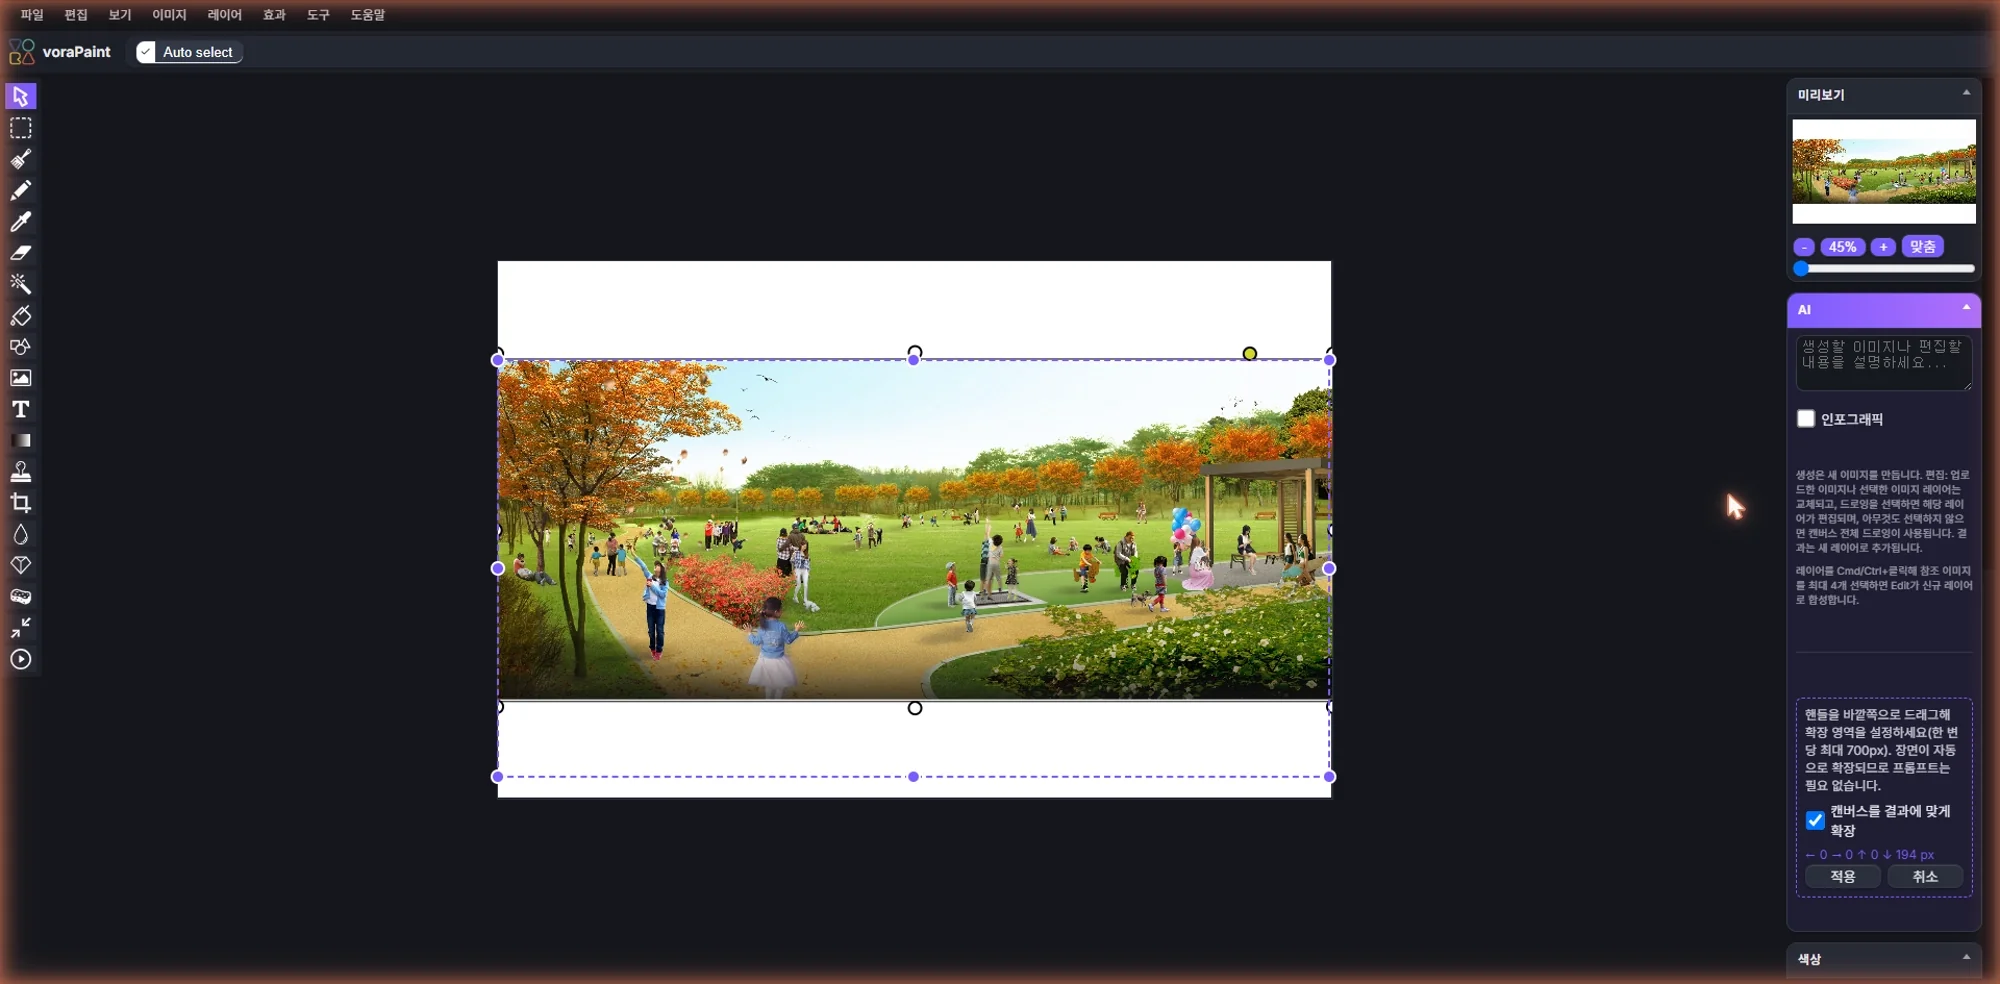
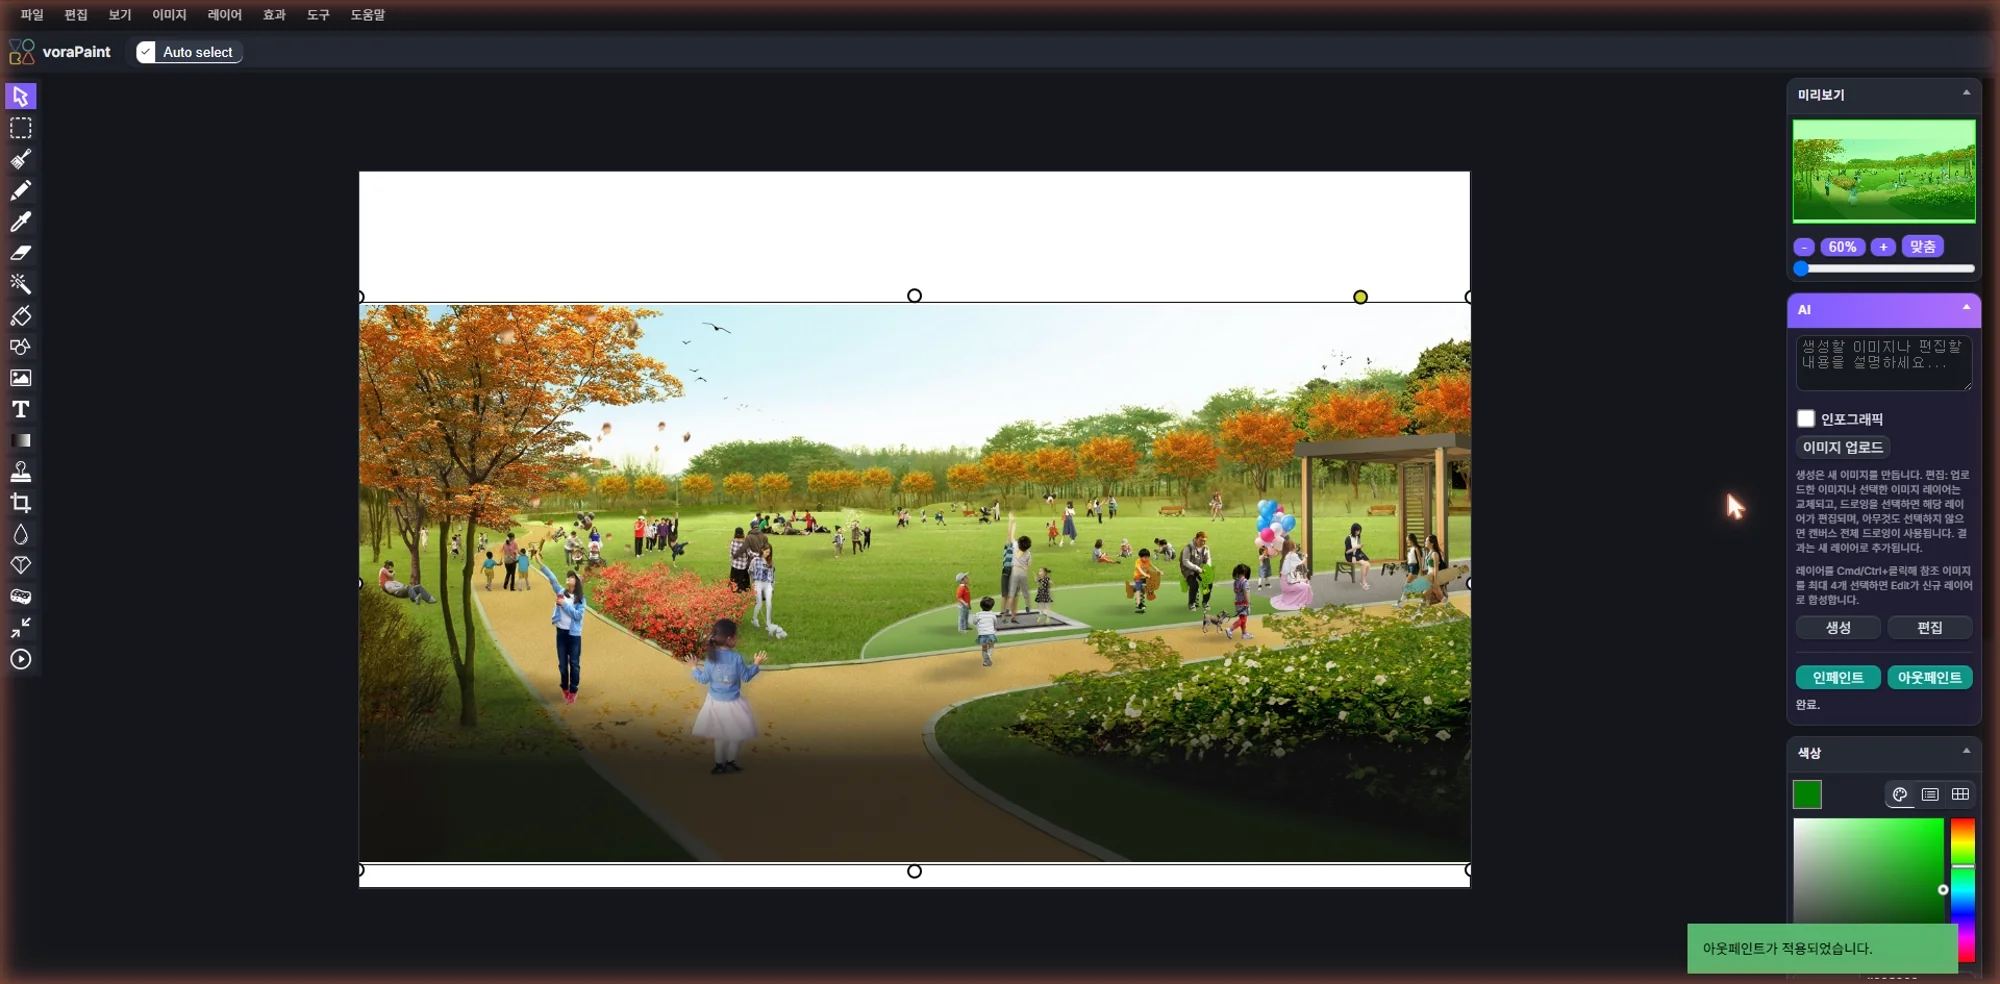
When can you use it?
The Image Workspace tool is especially useful in these situations.
- When you want to turn a scene in your head into an image, regardless of drawing skill
- When you want to turn a rough sketch into a convincing finished image
- When you want to cleanly erase or change only an unwanted part of a photo
- When you want to widen a cropped photo's background for a broader frame
- When you want to organize conversation content or material into an at-a-glance infographic
How to use it
Starting from chat — @vpaint
Depending on how you enter @vpaint in the input box, you can use it in 3 ways.
1. Open a blank editor
Enter @vpaint alone and a blank editor opens in a new tab. Use this when you want to start by drawing or uploading an image yourself.
2. Generate an image from a description
Add a description after @vpaint and the AI creates an image and opens the editor.
@vpaint a lighthouse over a seaside at sunset@vpaint turn the conversation above into an infographic(organizes it as an infographic)
3. Load and edit an internet image
Add an image address (URL) and an edit instruction after @vpaint, and it loads that image and edits it automatically.
@vpaint https://example.com/photo.png change the background to a night sky
Adding an image inside the editor
There are 3 ways to bring your own image into the editor. Unlike in chat, no URL is needed here.
- Pick a file with the Upload image button
- Copy & paste (Ctrl+V / Cmd+V)
- Drag and drop a file onto the screen
Transforming an added image with AI
- In the Layers list on the right, click to select the image layer you want to change.
- Write the style or change you want in the AI box. (e.g., "turn it into watercolor")
- Press the Edit button and the selected image changes to that style.
🛠️ Explore the professional editing features (if you want to use it like Photoshop)
The top menu of the editor includes everything you'd expect from a professional image editor. Here's what each item does.
File — Handling the image file itself
- New / Open: Start a blank canvas or load saved work
- Image Search: Find an image on the web and bring it to the canvas
- Export / Save As: Save your finished work as a PNG, JPEG, etc.
- Save as VORA URL: Save your work as a VORA link
- Print / Quick Save & Load: Print directly, or temporarily save and restore your work state
Edit — Undo and copy/paste
- Undo / Redo: Cancel or restore your last action
- Delete/Copy selection, Copy to clipboard, Paste, Select All: General editing operations
View — How the screen is displayed
- Grid / Guides: Turn on a grid or guides to help alignment
- Fullscreen: View the editor at full size
Image — Adjustments applied to the whole picture
- Info / Histogram: Check info like image size and color distribution
- Canvas Size / Trim / Resize: Change the workspace or image size
- Rotate / Flip / Move: Rotate, flip, or move the image
- Opacity / Color Correction / Auto Color: Adjust transparency and color
- Reduce Color Depth / Color Palette: Reduce the number of colors used or change the palette
Layer — Split the picture into stacked layers to edit separately
- New / New from Selection / Duplicate / Delete: Add, duplicate, delete layers
- Show·Hide / Rename / Move / Clear: Manage layers
- Rasterize: Fix shapes/text into a regular image
- Merge / Difference with layer below / Merge down / Flatten: Overlap layers or combine into one
- Layers let you split a picture into stacked levels so you can edit the background, figure, text, etc. separately.
Effects — A variety of filters to apply to photos
- Effect Browser: See and pick from all filters at a glance
- General filters / Instagram filters: Basic filters and Insta-style filter sets
- Grayscale·Blueprint·Sepia, Box blur·Zoom blur·Tilt-shift, Denoise·Sharpen, Dithering·Dot screen·Mosaic, Emboss·Edges, Oil paint·Pencil·Vintage, Color boost·Vibrance·Vignette, Heatmap·Night vision·Solarize, and more — filters that transform the feel of a photo in many ways
Tools — Special functions for precise editing
- Content Fill: Automatically fill an erased area to blend with its surroundings
- Color Zoom / Replace Color: Adjust only specific colors or swap them for others
- Restore Alpha: Recover transparent areas
- Sprite / Key Points: Editing helper tools
- Language / Search / Settings: Change the display language, search features, configure preferences
Help — Keyboard shortcuts, report a problem, about
Left toolbar & right panels — The left vertical bar has tools for drawing and refining directly (brush, pencil, eraser, shapes, text, crop, eyedropper, magic eraser, clone stamp, gradient, AI mask, and more), and the right side has panels for color selection (HSV·Hex), image info, layer management, and adjusting the selected layer's position, size, and opacity.
💾 Saving Your Work to VORA
The editor opens in a new tab, and the screen and its link expire after 1 hour. Once your image is ready, save it to VORA with the [Save to VORA] button.
Saved files are collected under Settings > My AI Generated Files, and they stay there even after you delete the chat or the link expires.
📁 What is My AI Generated Files?
It's the space where the images, documents, and videos created while using your AI are stored. (Settings > My AI Generated Files)
- Results created in a chat expire after a while, but files saved here stay available
- Deleting a chat does not delete the files you've saved here
- Storage is capped at 200MB. Once it's full, new files can't be saved — clear out what you no longer need
※ This is different from AI Knowledge Base. AI Knowledge Base is where you upload your own documents for your AI to read and refer to when answering. My AI Generated Files is the opposite — it's where the results your AI creates are collected.
Practical request checklist
For a stronger Image Workspace request, state the goal, input, scope, and output format together. Adding one more layer of constraints beyond the basic examples reduces follow-up questions and makes the result easier to use.
- Choose new creation or editing, then add reference images in the order they should be used.
- Set canvas ratio, regions to preserve, regions to change, and the target style.
- Define checkpoints and the final file’s purpose and format.
Review, save, and reuse the result
Treat the Image Workspace result as a draft or a snapshot taken at query time. Check the following before carrying it into the next task.
- Confirm that protected people, products, and text remain unchanged.
- Zoom in to check boundaries, hands, faces, lettering, and background continuity.
- Save the final file, then move useful outputs to AI Knowledge Base for reuse in later chats.